It’s been a while since I had my last automated time-lapse solution, and since the change of location and change of servers the setup has been lost in the ether.
Back then, it was achieved with an off the shelf IP Camera, a Windows Server share and a batch script. Now that the Linux / Raspberry Pi CCTV solution is up and running, I hope to re-instate the automated time lapse in a simpler way using MotionEye and Cent OS.

Capture Setup
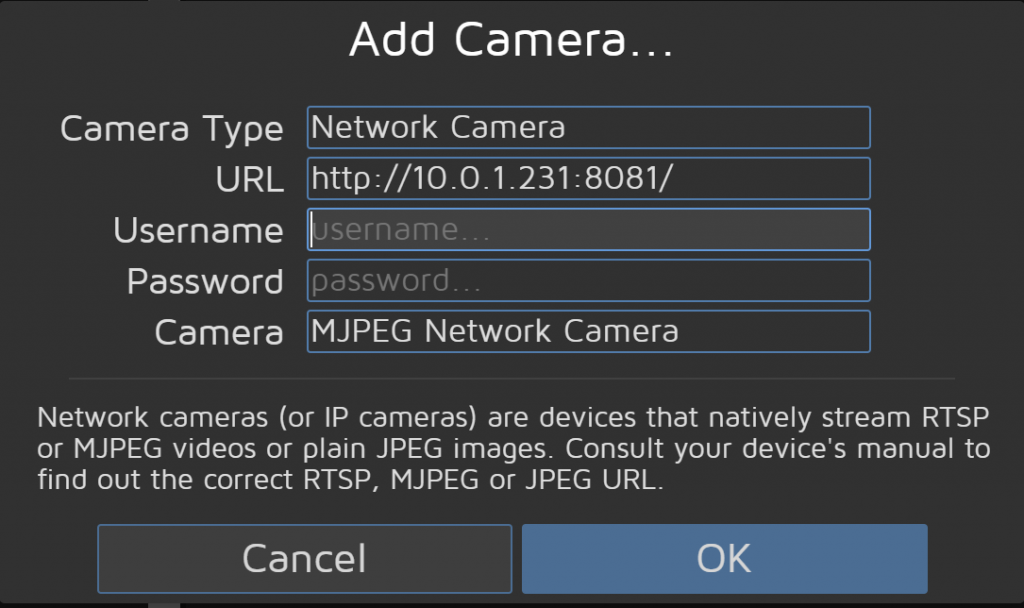
Beginning with the image capture, which is setup much in the same way as any other MotionEye Server setup.
On the Pi, set the camera up as a Fast Network Camera then add it to the server as a network camera.
In the Preference options, choose Still Images from the capture options. I find a 20 second interval for skyline capture a good balance between smoothness of video and speed of changes.
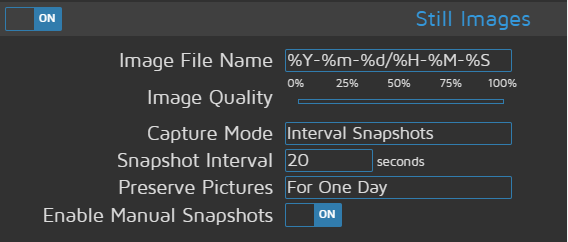
Do not change the filename template as this needs to match the script.
Images only need to be stored for one day, as the converted video will not be subject to the file removal.
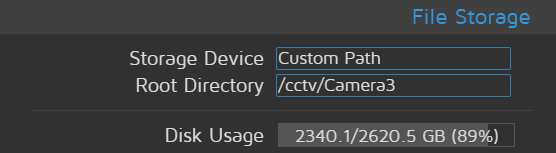
Finally, on the web GUI, make a note of the File Storage path, this will help with the next step.
Video Setup
Log into the server via SSH and navigate to the directory that contains the Camera folders
ls /cctv
Create a new folder for the video output
mkdir Timelapse
Now navigate back to your home directory
cd
Create a new script file
nano timelapse.sh
Paste the following into the new text document, replacing with your parameters
cd /cctv/Camera3/ &&
cd "$(\ls -1dt ./*/ | head -n 1)" && cat *.jpg | ffmpeg
-framerate 25 -f image2pipe -vcodec mjpeg -i - -vcodec mpeg4 -b:v 9999999
-qscale:v 0.1 -f avi /cctv/Timelapse/"timelapse_`date +%Y-%m-%d-%H-%M-%S`.avi"
Where /cctv/Camera3/ is the images saved from the camera
and /cctv/Timelapse/ is the time-lapse directory just created.
Save the script and exit with
Ctrl & O
Ctrl & X
Make the script executable with
chmod +x timelapse.sh
If there are images ready in todays folder, you can test the script by running this from the home directory.
./timelapse.sh
Next let’s create a trigger to run this script automatically
crontab -e
Enter the following in the new nano screen
58 23 * * * /root/timelapse.sh
This instructs the system to run the script at 23:58 every day
Save the cron and exit with
Ctrl & O
Ctrl & X
It’s now set, time to wait until the next day to see if it has run!