Driving a ST7066U LCD display from a Raspberry Pi

I’m between jobs at the moment, so to give my idle hands something to do I have started looking at using electronics with the Raspberry Pi.

To begin the journey, I decided to power a LCD text display, using this excellent Arduino article as a guide. As I was starting out I purchased everything needed in one order from RS Components, however they didn’t stock any displays with a HDD44780 controller.

Research revealed that a display with a ST7066U controller is compatible with being Pi powered. But be aware that although they have the same number of pins at 16, the layout may be different. I found out the hard way!

As this was the first time I connected the jumpers one at a time, and connecting the pins I thought would light the backlight, instead caused one of the chips on the LCD to get hot to the touch. Luckily I found that out quickly enough to avoid any permanent damage. Also, thanks to ordering from RS each component has a datasheet available, and so was able to connect up the correct pins.
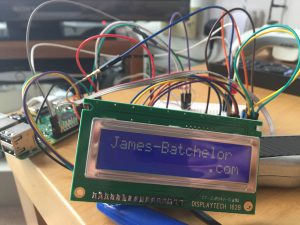
LCD-16x2

Lesson learned, establish the correct pin out on components before connecting up, other than that a ST7066U controlled LCD display can be controlled by a Pi the same as a HDD44780 controller.

Automated Time-lapse Solution

A while ago I worked on a simple CCTV system for work, which involved using software to capture images every second then batch convert them to video every five minutes. It was crude but did the job.

I also dabbled in the past with time lapse videos, however this was a more manual process with images capturing to a folder, then personally loading them into Windows Movie Maker to create the video. With the tedium of creating the videos, the software I used for capturing (YAWCam) would hang after a few weeks constant running, not to mention without upkeep, the hundreds of thousands of image files populating the hard drive.

As a project it was time to combine the learnings from these and create an automated time lapse video creator, a program that would capture images, then create a 5-minute video that contains the days’ footage, and finish by deleting the temporary images to leave just the days video.

image104062

Continue reading “Automated Time-lapse Solution”

Easy CCTV Solution using IP Cameras

For a while I have been looking for simple CCTV solution, where video is captured on a long loop, so when the storage is full the earliest dated footage is deleted to make way for new. And of course, footage is available for immediate review.

Many newer IP cameras, including my Trendnet TV-IP572W comes equipped with a microSD slot for recording on a rotating basis. However, this has two main caveats, firstly the investment in a microSD card to be used solely for this purpose and of a high enough capacity to record enough footage, especially with the introduction of HD capture. Secondly is accessing the footage, as it is effectively held on the IP camera it is the gateway to the data. In my experience this process is slow, with having to download each video file manually and slow transfer speeds.

Imagine wanting to view an event that could have happened over a span of a few hours, and with video captured in segments of 5 minutes at most, the whole process can become tedious very quickly.

Therefore, I came up with another solution, one that uses my server’s hard disks for video storage to save on money while allowing larger video retention than a micro SD card. Also the ability to automatically delete older files to make way for new. This method uses Samba settings of an IP camera to save video to a Windows Server, and on the server itself, employing Disk Quota management to effectively trick the camera into thinking it only has a certain amount of disk space, to allow the cyclic video retention and prevent the footage taking up a whole drive on the server.

Continue reading “Easy CCTV Solution using IP Cameras”

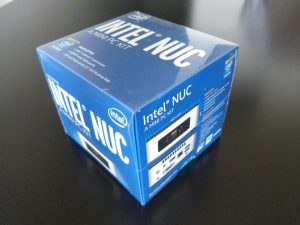
Review: Intel NUC5CPYH N3050

With the untimely demise of the Gigabyte Brix, I needed to find another solution for a small machine that would handle all web traffic to my sites. My fingers got burnt by using Gigabyte so this time I decided to track down an Intel marketed machine, they were the first to pioneer the net-top device and so commanded a premium over other manufacturers.

Price always at the forefront, I picked up an Intel NUC5CPYH, at £120 for a barebones system it featured an Intel Celeron 2.16Ghz processor at the helm, with the same single DDR3L slot and support for a 2.5 inch HDD/SDD as the Brix, which I recovered from the deceased system.

nuc1

Continue reading “Review: Intel NUC5CPYH N3050”

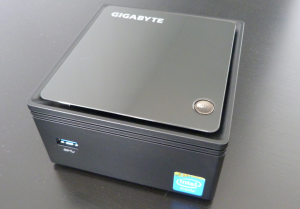
Review: Gigabyte Brix GB-BXBT-3825

Let’s hope three servers is a charm, as its time for a new server. But this time I’m moving away from the HP Microserver. Why? Well the new server is destined to be a dedicated web server for my sites, ever concerned with security and protecting my network I thought it wise to separate the public facing websites physically from my data, adding an extra layer of security.

The choice was to go for a NUC based machine or Nettop, their small footprint allows them to be placed out of the way, plus they are in keeping with my low power requirements and often fan-less design keeps them quiet. As it’s to be a web server only, the restrictions on a device this size such as space for multiple hard drives, graphics performance and upgradability are not an issue.

Gigabyte Brix GB-BXBT-3825 Continue reading “Review: Gigabyte Brix GB-BXBT-3825”

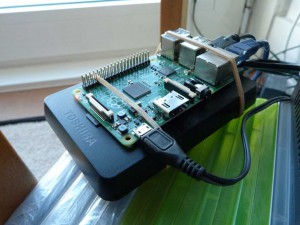
Raspberry Pi Torrent Server – From Scratch

As requested, this is a guide to taking a Raspberry Pi and turning it into an always on Torrent box, complete and self-sufficient with its own mass storage meaning it needs no help from other computers. Also, as the Pi consumes such little power compared to a full desktop PC, money can be saved by using the Pi for overnight transfers while other computers can remain off.

piserver1

For this project I recommend a RPi 2, as its powerful enough to perform the transfers up to its maximum 100Mbps network speed, and is a cheaper choice since the RPi 3 superseded it last year. To get started, you need the following hardware:

  • Raspberry Pi 2 board.
  • Micro USB wall adaptor – Needs to be capable of 2Amp output.
  • Micro SD card – Minimum of 8GB, class 6 or above, plus SD adaptor for connecting to a PC.
  • USB Portable Hard drive – USB powered is preferred, I use a Toshiba Canvio Basics 1TB.
  • Ethernet Cable – And spare port on the modem/router for internet connection.
  • A PC – On the same network as the Pi for connection and configuring.

The Pi was designed to as low cost as possible to the user, so apart from the Pi board you may already have everything to run a Pi, and if not these are cheap and easily available online.

With a RPi 2 at hand, let’s get started…

Continue reading “Raspberry Pi Torrent Server – From Scratch”

2 Servers 1 UPS, Windows 2012 Edition

In a previous post I showed how to shutdown two servers safely using just one UPS with a single communications port. It was pretty straight forward with the comms port connected to a Windows Server 2003 machine.

But doing the same with Windows Server 2012 is much more difficult, since Microsoft decided to remove the ability to run a program on a low battery event from its power management settings. To make things worse I discovered that a bug in Server 2008 and later meant that issuing a Shutdown command from the native power settings would not perform a clean shut down, instead killing the power in a few seconds. This is not good news for RAID arrays and data integrity.

Time for a new solution, and since Microsoft are of no use, help would need to come from a 3rd party. After research and testing answer came from Shutter, a small program that runs as a trigger and event type program for a variety of different scenarios, with battery discharging status being one. Luckily two instances of the program could be run, one to shut down the remote servers and another for the host machine. Importantly the program can also be run as a Windows service, but more on this in the walk through.  here is how it is done:

Continue reading “2 Servers 1 UPS, Windows 2012 Edition”

New Website: Canton TV

In January I was given the opportunity to design and build a new website to help colleagues in the retail store where I worked. This website serves as a demonstration on how I took my website and server knowledge to create a low cost solution to an issue I was confronted with.

This occurred when working in a retail store but can be re-purposed to suit other needs.

cantontv

What I came up with was Canton TV, a website written in ASP.NET C# and hosted on my home server, it served as a tool for colleagues of varying technological skills create messages and upload images for display in video format on screen in a communal area of the store.

Read on for the full story…

Continue reading “New Website: Canton TV”

Adding Kodi Sources Manually

During my migration from Windows Server 2003 to Server 2012, I encountered an issue with Kodi on Raspberry Pi and how it connects to the Win 2012 file share. When accessing the server with a Samba file share instead of a prompt for credentials the error message “Operation not permitted” is displayed.

Kodi Operation Not Permitted

Kodi allows the manual adding of network locations but does not support adding the credentials that are needed to access the location.

Therefore a bit of tweaking is needed to get access to Windows 2012 shares on Kodi.

Continue reading “Adding Kodi Sources Manually”

Connecting to a Headless Raspberry Pi

A great feature of the Raspberry Pi is that it can be fully used as a headless unit, meaning it does not need a monitor, keyboard or any other input device connected. This is great when running it as a server or for automated processes that require the unit to be tucked away.

What is annoying is that setting up the Pi for the first time may need those input devices to be able to configure the network and install applications. Thankfully there is a way to connect to a headless Pi from the start, with it only needing power and Ethernet connection.

Continue reading “Connecting to a Headless Raspberry Pi”