The arrival of the Raspberry Pi 2 meant the B+ previously used as a server was now ready for a new purpose. These little machines make great media players and is easy to setup so this would be its new role.
However, this Pi would be in my parents’ home, and miles away from where my videos are stored. I didn’t want to add a hard drive locally as syncing the library would be an issue. But thanks to the fibre internet connection on the server side I could upload at 10Mbps, enough to stream media across the net.
Therefore, the plan is to use an install of OSMC and add a VPN connection to my home server that starts when the Pi starts to make the operation seamless.
How To:
Start with a running Pi with OSMC on. Log in to the Pi via SSH using osmc for the username and password.
When logged in, perform “sudo apt get update” and “sudo apt get upgrade” to ensure the latest software is installed, then install the PPTP client by running “sudo apt get install pptp-client”
With the PPTP client installed a connection file is needed, however the folder it needs to be in requires elevated privileges to access. So type “sudo bash” to gain administrator control.
Then navigate to the folder with cd /etc/ppp/peers
Open a new text file using “nano connectname” where connectname is the name of the new file.
Enter the following connection settings:
pty “pptp REMOTESERVER –nolaunchpppd –debug”
name USERNAME
password PASSWORD
remotename PPTP
require-mppe-128
require-mschap-v2
refuse-eap
refuse-pap
refuse-chap
refuse-mschap
noauth
debug
persist
maxfail 0
defaultroute
replacedefaultroute
usepeerdns
Where REMOTESERVER, USERNAME and PASSWORD are the address and credentials use to connect to the VPN.
Type Ctrl + O to save and Ctrl + X to exit the text editor.
The VPN connection can be tested by entering pon connectname, have a look on the server to see if a connection is established or typing ifconfig in the terminal and look for a ppp0 adaptor. If it fails, use poff connectname to disconnect then edit the config file.
With a successful connection made, next up is to make the connection start with the Pi, navigate to the home directory using cd /home/osmc
Create a script, by creating a text file with nano connect.sh
In the new file, enter the following:
#!/bin/bash
sudo pon hartland
Ctrl + O to save and Ctrl + X to exit
Make the file an executable using chmod +x connect.sh
With the script created and executable, edit the start-up file that will run the script when the Pi boots, open it by using nano /etc/rc.local, as this is editing an established file the following screen should appear:
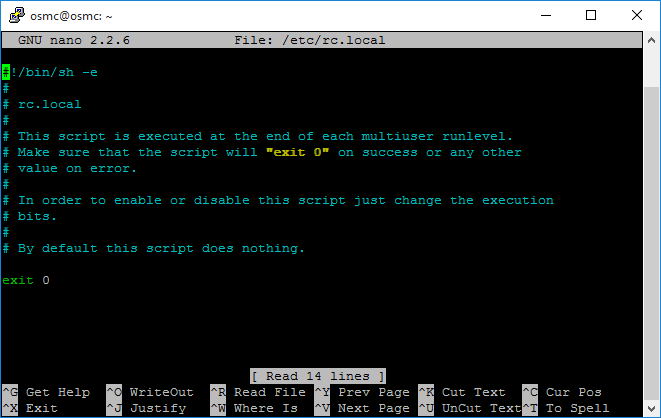
After the lines starting with # and before exit 0, add the following line:
(sleep 20;sudo /home/osmc/connectvpn.sh)&
So the file looks like the following:
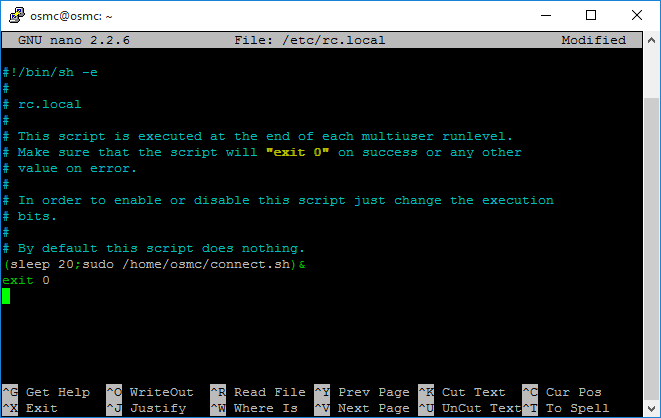
Ctrl + O to save, Ctrl + X to exit and it is set up. The Pi is now setup to connect to the VPN at boot, test by rebooting the Pi and monitoring the server to see if a connection is made.
Tweaking
During this setup an issue arose where a VPN was made, but upon any attempt to access files the connection would drop, and looking at ifconfig on the Pi showed unfeasibly large amounts of transmitted data on ppp0 adaptor.
To rectify this, a manual IP route is required to show the Pi a useable path to the remote network, this may be needed also if the remote network is on a different subnet to the local.
Do this by entering route add -net 192.168.1.0 netmask 255.255.255.0 dev ppp0 at the command line, replacing 192.168.1.0 with the subnet required and the final value 0. Test by pinging servers or machines on the remote network to see if they reply.