Hopefully the mad dash for home working is over, and now everyone who can has settled in to a comfortable home setup with new knowledge of what a VPN and remote desktops are all about.
I thought my established home setup was great, however I didn’t envisage words like Teams and Zoom to become the buzzwords of companies the world over.
This posed an issue for myself. Even though my 2017 Dell XPS has a webcam ready to go, it spends its home office days docked with the lid closed. When opening the 4K screen combined with the Full HD monitors, Windows implementation of scaling rears is appalling head and just looks terrible. Combined with the Dell’s decision to locate the webcam below the screen to give maximum nostril-cam angle, its not something I like to use.
Buying a USB webcam didn’t seem worth it for what is (hopefully at time of writing) a temporary solution.
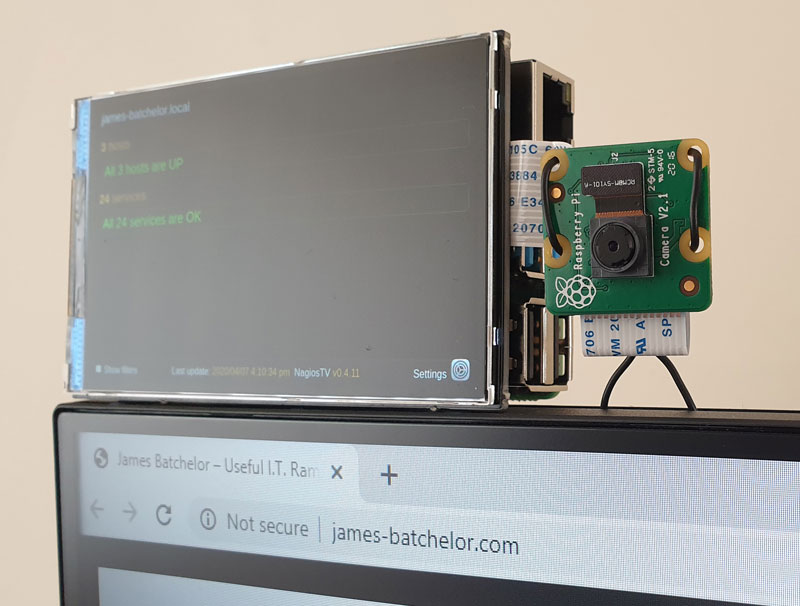
So in comes another Pi project, this time using a spare Raspberry Pi Camera module connected to an aptly placed Pi, that can be used on a Windows machine for the software likes of Zoom, Skype and Teams…
Pi Setup
Enable Camera
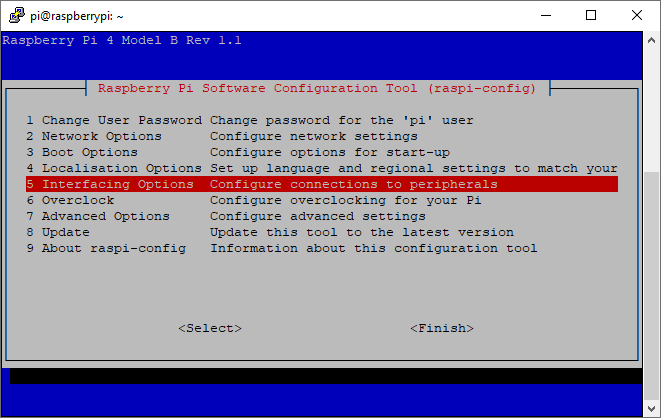
Using a fresh install of Raspbian Buster, locate and login to SSH of the Pi and run the configuration utility:
sudo raspi-config
In the menu, navigate to 5. Interfacing Options, then P1 Camera, and enable.
Navigate back to the main menu and Enter on Finish, select Yes if prompted to reboot.
Set Static IP
The camera will be accessed over the network, so makes life easier and more reliable for it to always be found on the network in the same location. In an SSH session, enter:
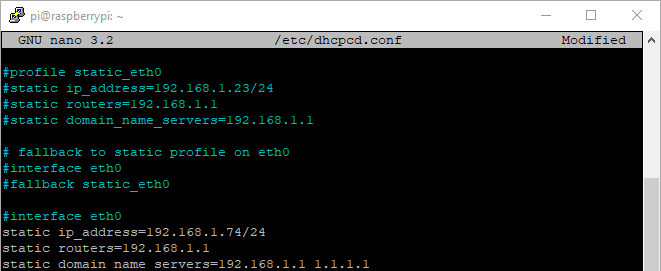
sudo nano /etc/dhcpcd.conf
Scroll to the bottom of the page and enter the following:
static ip_address={IP ADDRESS}/24
static routers={ROUTER ADDRESS}
static domain_name_servers={ROUTER ADDRESS}
Install Software
The software I’d prefer for this task is MJPEG Streamer, a lightweight camera image generator that has come to my aid when setting up a CCTV system.
Start with installing the dependencies:
sudo apt-get install build-essential imagemagick libv4l-dev
libjpeg-dev cmake
Download the MJPEG Streamer files from git:
git clone https://github.com/jacksonliam/mjpg-streamer.git
Navigate the folder in order to compile:
cd mjpg-streamer/mjpg-streamer-experimental
Then compile:
make
No errors? Go and install it:
sudo make install
This will install the program, and leave you at the command line with little fanfare…
Testing
Sanity check, and time to see if the software will work, from the command line run the following:
/usr/local/bin/mjpg_streamer -i "input_uvc.so -r
1280x720 -d /dev/video0 -f 30" -o "output_http.so -p 8080 -w
/usr/local/share/mjpg-streamer/www"
These are the common variables should you need to adjust anything to get started:
-r 1280x720 – Set stream output resolution
-f 30 – Framerate
-p 8080 – Port the stream binds to
From another PC, open a browser and navigate to http://{IP ADDRESS}:8080/?action=stream where {IP ADDRESS} is that of the Raspberry Pi.
Launch at Startup
You may notice when testing the above test command that it occupies the command line whilst running, and doesn’t allow any other tasks, exiting the program by using Ctrl + C also stops the video stream.
Therefore its more convenient to have the camera stream start when the Pi starts, and have it run unhindered in the background to give easy access to the Windows machine.
Script File
Before it can start automatically, the command needs to be wrapped in a script file and executed:
Open a new text file with nano, located in the Pi (Default user) home directory:
sudo nano /home/pi/camstart.sh
Paste the command tested above into the file, then save and exit with Ctrl+O and Ctrl+X

This file needs to be executed, so give it execute permissions:
sudo Chmod +x /home/pi/camstart.sh
Script made, it needs to be run at boot, this can be done with cron:
sudo crontab -e
Enter the following on a new line at the bottom of the file:
@reboot /home/pi/camstart.sh
Use Ctrl+O and Ctrl+X to save and exit.
Now to see if it worked, restart the Pi gracefully with:
sudo shutdown -r now
When it re-appears, visit http://{IP ADDRESS}:8080/?action=stream again and see if you have a live stream.
Windows Setup
Now the camera is setup and broadcasting the image over the local network, we need something on the windows machine to capture and convert it and make it recognisable by video conferencing software.
There are a number of applications that can achieve this, but often it is an addon to a much larger software suite and would be considered to be bloatware to what we want to achieve.
Cue IP Camera Adapter 3.1 https://ip-webcam.appspot.com/ as a lightweight application that has just does the conversion process and nothing else.
Run the setup wizard and upon installation, run the “Configure IP Camera Adapter” from the start menu:
Enter http://{IP ADDRESS}:8080/?action=stream into the URL field.
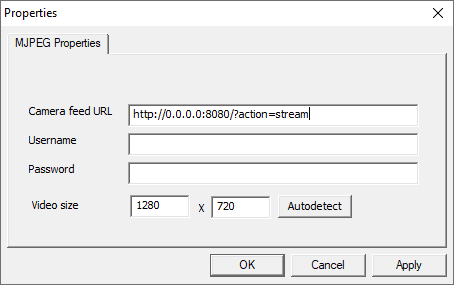
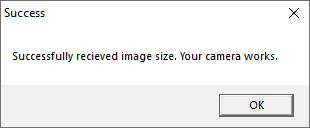
And test the link by pressing Autodetect, the message with tell you if it was successful:
Final Testing
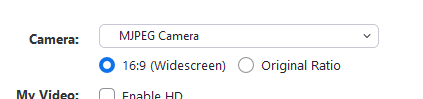
From here the camera should be available on most video software, you will just have to update it to use the newly added camera, this will be labelled as MJPEG Camera: