A great feature of the Raspberry Pi is that it can be fully used as a headless unit, meaning it does not need a monitor, keyboard or any other input device connected. This is great when running it as a server or for automated processes that require the unit to be tucked away.
What is annoying is that setting up the Pi for the first time may need those input devices to be able to configure the network and install applications. Thankfully there is a way to connect to a headless Pi from the start, with it only needing power and Ethernet connection.
Finding the Pi
Most operating systems for a RPi use DHCP on first boot, allowing the machine to connect to the internet automatically. This also means that when booted, the Pi makes itself visible to the network and therefore allow incoming connections. The guess work comes in finding what IP address the Pi was allocated to be able to connect, this is where Angry IP scanner can be used to pinpoint the Pi’s location.
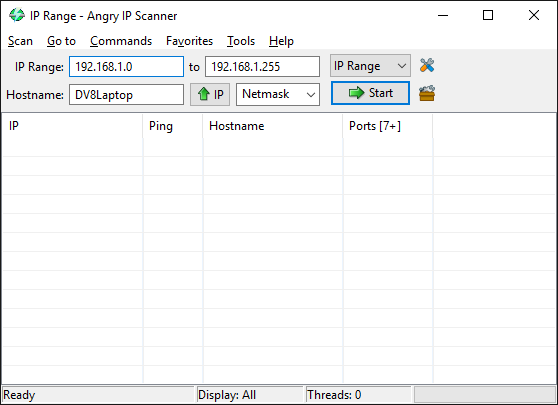
Download and run Angry IP scanner on a computer connected to the same router/hub, the IP address range to scan is already entered based on your computers IP address. Click on the Preferences button ![]() and move to the Ports tab.
and move to the Ports tab.
In the Ports field, enter number 22, this is the port number for Linux SSH protocol that allows command line controls of a system, and is open on most distributions.
Click OK out of the menus and start the scan.
After the scan is complete a list of all possible IP addresses on the local network is displayed, some will be “alive” connections which are active devices on the network, look for a device with an active port 22 and a Hostname that relates to the Pi or distribution installed on it, like below:
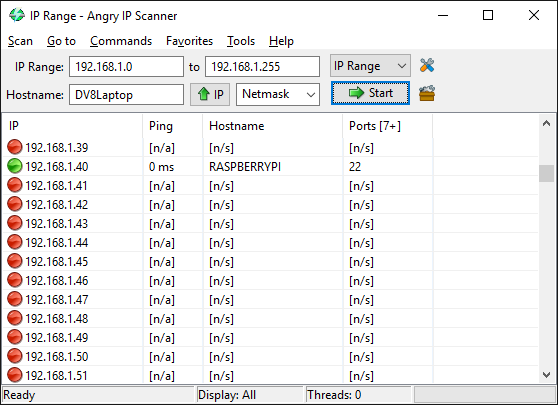
This will be the IP address for the Pi, dependant on the router / hub its connected to, this will remain the same until the router is restarted, so it may be of use to allocate a static IP address to allow easier connections.
Connecting to the Pi
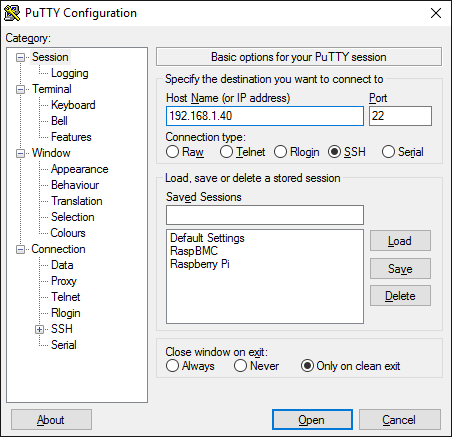
With the IP address found, it’s time to connect to the Pi. To achieve this a terminal program is needed, Windows systems used to have this on all installs but more recently has been relegated to an optional add-on. However, a free and lightweight program called Putty is easily available to make connections to a Linux system.
Download and install Putty, enter the Pi’s address in the IP field and make sure the port number is 22, then hit connect. If it’s the first time connecting, a certificate warning will appear, click yes and the connection is made.
Log on using the default credentials of the distribution and full control is made over the Pi, simple a that!
Adding remote desktop control
If controlling the Pi using command line only is a bit daunting, there is a way to simulate the desktop of the Pi on another computer. Setup is via command line but is simple and will get to a desktop environment quickly.
Use Putty to connect and log in to the Pi, then enter sudo apt-get update in the command line, followed by sudo apt-get upgrade when the screen stops scrolling and your able to type commands in again. These actions ensure the operating system is fully up to date.
Next, enter sudo apt-get install xrdp to install the remote desktop server on the Pi, you may have to enter Y to confirm the installation.
That’s it for command lines, type exit to finish the session and close Putty. Now from a Windows machine, look for Remote Desktop Connection in the start menu and open.
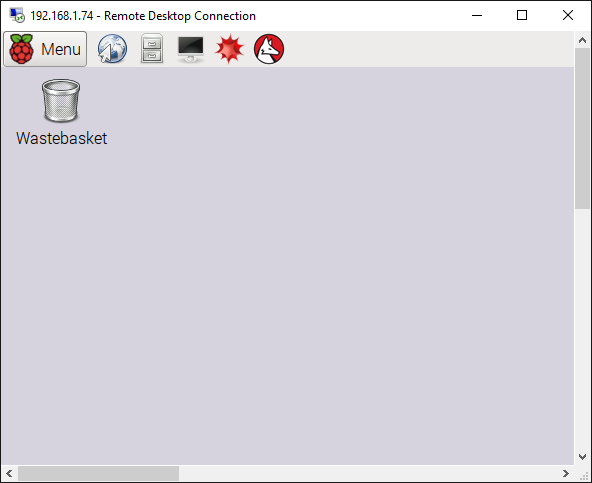
In the address field, enter the IP address for the Pi and click connect.
Enter the login credentials for the Pi and soon the Pi’s desktop will appear, as if it was a monitor connected directly to the Pi.