Raspberry Pi Temperature Display

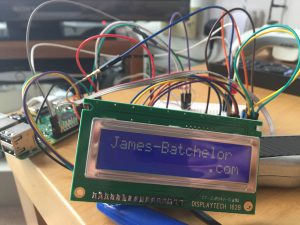
Nothing grand to start with, but as a first project I thought to combine a 20×4 LCD display with two DS18B20 temperature sensors to monitor indoor and outdoor temperatures. This would replace a cheap display I had been using but was sceptical on its accuracy.

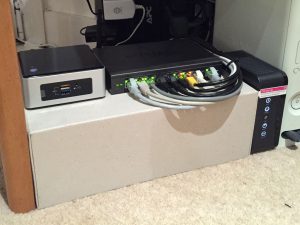
Getting the basics right involved making the device blend in to the current setup without the usual mass of wires protrude. From the last round of the seam ably endless cable management war I used a shoebox base as a stand for the webserver and network switch, with the box hiding the various power bricks and extra cable, with most coming from the Xbox 360. Still having the shoebox lid I thought it would be good to use as a modular part to house the Pi and display.

Current Setup
Current Setup

Continue reading “Raspberry Pi Temperature Display”

Driving a ST7066U LCD display from a Raspberry Pi

I’m between jobs at the moment, so to give my idle hands something to do I have started looking at using electronics with the Raspberry Pi.

To begin the journey, I decided to power a LCD text display, using this excellent Arduino article as a guide. As I was starting out I purchased everything needed in one order from RS Components, however they didn’t stock any displays with a HDD44780 controller.

Research revealed that a display with a ST7066U controller is compatible with being Pi powered. But be aware that although they have the same number of pins at 16, the layout may be different. I found out the hard way!

As this was the first time I connected the jumpers one at a time, and connecting the pins I thought would light the backlight, instead caused one of the chips on the LCD to get hot to the touch. Luckily I found that out quickly enough to avoid any permanent damage. Also, thanks to ordering from RS each component has a datasheet available, and so was able to connect up the correct pins.

LCD-16x2

Lesson learned, establish the correct pin out on components before connecting up, other than that a ST7066U controlled LCD display can be controlled by a Pi the same as a HDD44780 controller.

Automated Time-lapse Solution

A while ago I worked on a simple CCTV system for work, which involved using software to capture images every second then batch convert them to video every five minutes. It was crude but did the job.

I also dabbled in the past with time lapse videos, however this was a more manual process with images capturing to a folder, then personally loading them into Windows Movie Maker to create the video. With the tedium of creating the videos, the software I used for capturing (YAWCam) would hang after a few weeks constant running, not to mention without upkeep, the hundreds of thousands of image files populating the hard drive.

As a project it was time to combine the learnings from these and create an automated time lapse video creator, a program that would capture images, then create a 5-minute video that contains the days’ footage, and finish by deleting the temporary images to leave just the days video.

image104062

Continue reading “Automated Time-lapse Solution”

Easy CCTV Solution using IP Cameras

For a while I have been looking for simple CCTV solution, where video is captured on a long loop, so when the storage is full the earliest dated footage is deleted to make way for new. And of course, footage is available for immediate review.

Many newer IP cameras, including my Trendnet TV-IP572W comes equipped with a microSD slot for recording on a rotating basis. However, this has two main caveats, firstly the investment in a microSD card to be used solely for this purpose and of a high enough capacity to record enough footage, especially with the introduction of HD capture. Secondly is accessing the footage, as it is effectively held on the IP camera it is the gateway to the data. In my experience this process is slow, with having to download each video file manually and slow transfer speeds.

Imagine wanting to view an event that could have happened over a span of a few hours, and with video captured in segments of 5 minutes at most, the whole process can become tedious very quickly.

Therefore, I came up with another solution, one that uses my server’s hard disks for video storage to save on money while allowing larger video retention than a micro SD card. Also the ability to automatically delete older files to make way for new. This method uses Samba settings of an IP camera to save video to a Windows Server, and on the server itself, employing Disk Quota management to effectively trick the camera into thinking it only has a certain amount of disk space, to allow the cyclic video retention and prevent the footage taking up a whole drive on the server.

Continue reading “Easy CCTV Solution using IP Cameras”