If you’d ever searched for Raspberry Pi projects that involved a camera then the results would certainly include Motioneye OS, an easy to use self-contained operating system that is truly (write then) plug and play.
Looking for a CCTV project earlier this year I too was drawn in by this, and with my small abundance of RPi spares it was the cheapest choice, using a couple of RPi 3B+ for video, and a Zero W for time-lapse image capture. All processing was self-contained on each Pi with capture data passed over via SMB to a Windows file share.
This worked, but had a couple of problems that prevented it from being trustworthy. Firstly, it stops recording video after a few days of uptime, by creating empty files. And secondly the time-lapse camera seemed to reset every few minutes that created in white out image capture as the camera’s exposure setting recalibrated, ruining a time-lapse video.
Looking wider there was also the performance issue. In Motioneye OS’ default state of managing all features, the highest FPS seemed to max at 15 fps even on the Pi 3B+. Forums suggest this is due to the motion eye daemon handling all the image processing in software, putting a strain on the Pi’s modest CPU.
The idea and goal is to move the processing and IO responsibilities to my server, which would be far more capable than the then latest available RPi, and as I have chosen Cent OS to be my go-to Linux OS of choice, this is what I’ll be using.
A gateway to make this possible is an option in Motioneye OS, Fast Network Camera. This when set relinquishes the Pi of all processing duties and serves to just stream the camera capture as best as possible via MJPEG.
Here’s how to set up Motioneye on a Cent OS server to be a central data hub for a network of RPi Motioneye OS cameras.
OS Setup
In this VM setup two drives (VHD) are allocated, a 16GB drive for the OS, and a 2.6TB drive to be manually mounted and used solely for capture storage. Both VHD’s are contained on the same single 3TB 6Gbps SATA drive.
Run the Cent OS install wizard, choosing just the 16GB drive as the install destination. Its also helpful at this stage to configure a static IP for easier locating.
On successful setup and reboot, login via SSH and enter fdisk -l to discover the location of the large disk.

As the disk is larger than 2TB, we need to use the parted command to create a GPT disk format, in this case enter
parted /dev/sdb
Within the parted command, enter this to create the file system.
mklabel gpt
Assign the size of the partition to use the entire disk (referenced from the earlier fdisk -l command).
mkpart primary 0GB 2858GB
Exit parted.
quit
Format the new partition to make it usabl.
mkfs.ext4 /dev/sdb .
To use this new drive it first needs to be mounted to the sile system, and to do this it needs an entry point. Add a new folder as the entry point then mount the new drive to it.
mkdir /cctv
mount /dev/sdb /cctv
Check to see if its connected
df -h

This drive link will not work after a reboot, to do this the /etc/fstab file needs to be added to.
My file editor of choice is nano, so I enter this to start editing:
nano /etc/nano
Nano is not available with the minimal install of Cent OS, to install, enter yum install nano, follow the prompts and nano is installed.

Add the following:
/dev/sdb /cctv defaults 0 0
Then save and exit.
Ctrl +O
Ctrl +X
Cent OS prerequisites
The Motioneye Install Guide had options for a number of Linux distributions but Cent OS is not listed. The closest match is Fedora which like Cent is based on the Red Hat architecture. To mimic a fedora install a couple of Repository libraries need to be added so the OS can find the install files, enter the next two commands and accept the prompts to add:
yum install epel-release

yum localinstall --nogpgcheck https://download1.rpmfusion.org/free/el/rpmfusion-free-release-7.noarch.rpm https://download1.rpmfusion.org/nonfree/el/rpmfusion-nonfree-release-7.noarch.rpm
Motioneye Install
Before Motioneye can be installed it needs the supporting software to be installed beforehand/
yum install motion ffmpeg
Install the building language and associated software:
yum install python-pip python-devel gcc libcurl-devel
pango-devel
Now to download and install Motioneye:
pip install motioneye
Create the operating folders and copy the configuration files to their intended location:
mkdir -p /etc/motioneye

cp /usr/share/motioneye/extra/motioneye.conf.sample /etc/motioneye/motioneye.conf
Edit the motioneye.conf file to utilise the 2.6TB drive for storage:
nano /etc/motioneye/motioneye.conf
Edit the following line:

Ctrl+O to save and Ctrl+X to exit
Enable Motioneye to run as a service and to start at boot, and start it for the first time:
 cp /usr/share/motioneye/extra/motioneye.systemd-unit /etc/systemd/system/motioneye.service

systemctl daemon-reload

systemctl enable motioneye

systemctl start motioneye
Samba Setup
To enable easier access to the footage, installing Samba allows Windows machines selective access to the Linux file system.
Install the samba service:
yum install samba samba-client samba-common
Make a backup of the config file in case anything goes wrong:
cp -pf /etc/samba/smb.conf /etc/samba/smb.conf.orig
Use nano to edit the config file:
nano /etc/samba/smb.conf
Remove the default setup and replace with the below. This creates a network share with access to the cctv folder, allowing Linux users in the “smbgrp” group access to it:
[global]
        workgroup = WORKGROUP
        security = user
        passdb backend = tdbsam
        printing = cups
        printcap name = cups
        load printers = yes
        cups options = raw
[cctv]
        comment = Camera Store
        path = /cctv
        valid users = @smbgrp
        force user = root
        browseable = Yes
        read only = No
Now lets add a new user and give it secure access to the cctv folder.
Create the access group:
groupadd smbgrp
Add the user and assign it to the group:
useradd cctv -G smbgrp
Set the password for the new user:
smbpasswd -a cctv
Next to amend the permissions of the cctv folder to grant access via Samba:
chmod -R 0777 /cctv
chcon -Rt samba_share_t /cctv
Time to set Samba to start on boot, and start for the first time:
systemctl enable smb.service
systemctl enable nmb.service
systemctl start smb.service
systemctl start nmb.service
From a Windows machine, navigate to the server and check that the folder is accessible.
Firewall
Lets allow access to MotionEye and Samba from the outsode world (including local network) by editing the firewall:
MotionEye needs port 8765 opened to allow setup and administration:
firewall-cmd --add-port=8765/tcp –permanent
Samba is a recognised service, so this can be allowed by entering:
firewall-cmd --permanent --add-service=samba
Commit these changes by entering:
firewall-cmd --reload
Testing
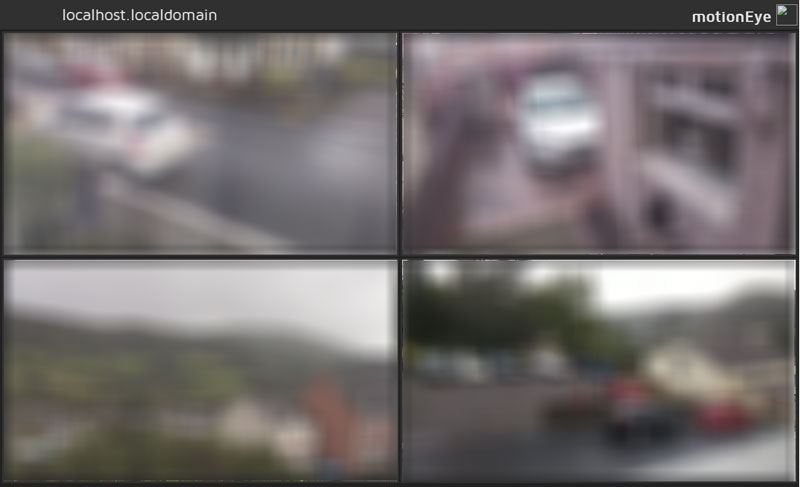
From here and all things well, the MotionEye frontend should be available by visiting the server at http://server_ip:8765 .
Login with a username of admin and entering no password, which takes you to the familiar Motioneye GUI.
Camera Setup
Server now running the Pi Camera units need configuring / reconfiguring to be accessible to the server.
From Motioneye OS on the Raspberry Pi, login to access the settings options, navigate to General Settings and toggle on Advanced Settings. Click Apply.
Now navigate to Expert Settings and toggle on Fast Network Camera, click Apply.

Logging in again after the system reboot everything looks the same initially, but now capture controls are replaced with just Video and Streaming controls, and this does give more access to the finer details of the camera.
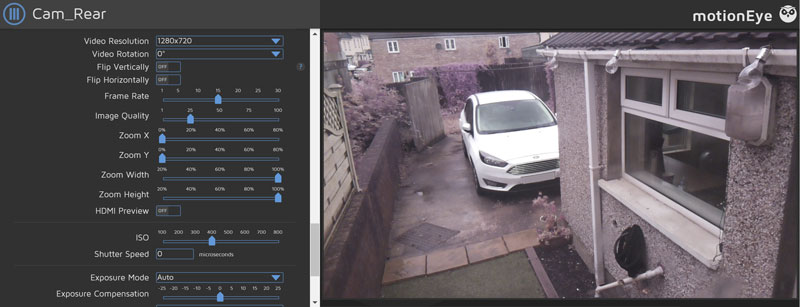
In the Streaming section, the stream port and authentication can be set. Authentication is not required, but is recommended if the server is on a shared network, as the footage will be available to view on any device on the network.
The streaming section also reveals the Stream URL, which is need to add the camera to the server…
Adding Cameras to Motioneye Server
Log back in to the Server’s Motioneye frontend, click the No Cameras dropdown box and choose Add Camera.
Choose Network Camera from the next dropdown box and add the streaming URL of the Pi camera to the address field, and credentials if set on the Pi. If correct the Camera field will auto populate:
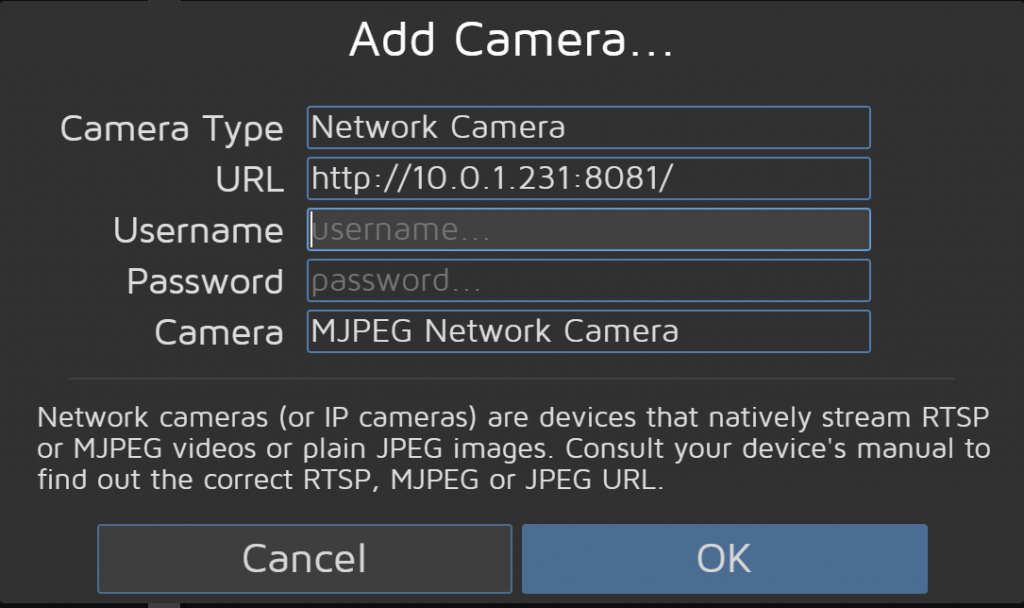
Click OK to add camera. From here the familiar capture storage options are now available and configurable.
Additional cameras can be added in the same way.
Tweaking
Setup does require revisiting in the first few days to ascertain how many days footage can be retained before drive space runs out, if it does, MotionEye will stop recording. I had the benefit of setting this up during the height of summer, where the longer daylight hours create more capture data to store. As the nights draw the storage requirements per day will reduce.
Since the raw MJPEG video stream is being pulled by the server over the network as opposed to a data file, its worth considering what impact this will have on your network. To find out how much data is flowing iftop is a tool available on Cent OS to visualise this, to install run:
yum install iftop
Then run with:
iftop -n
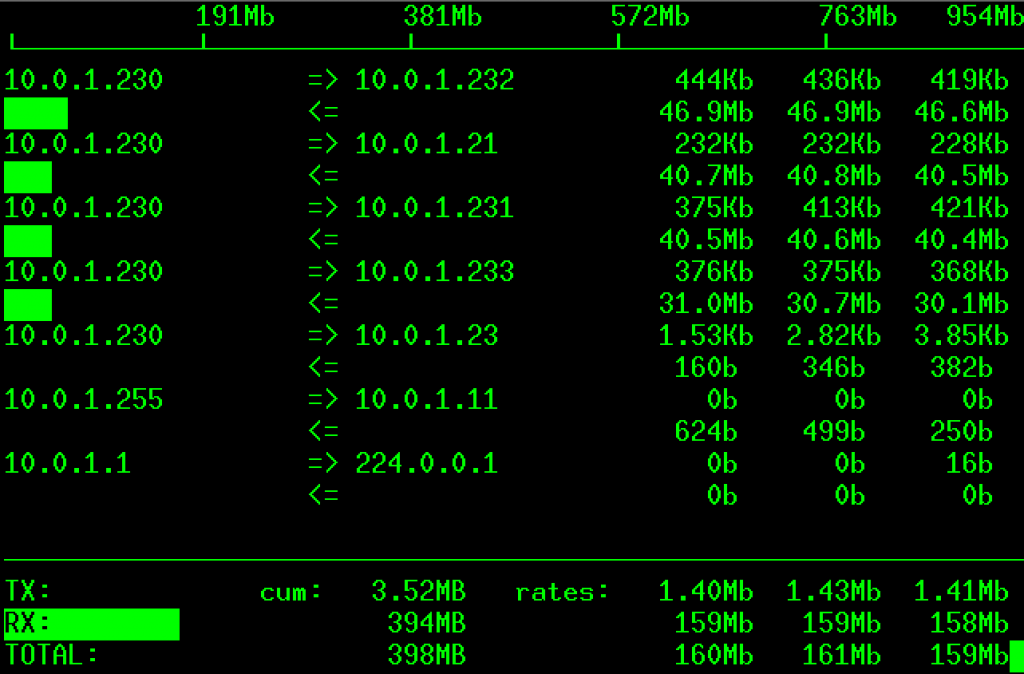
Iftop shows data flow rates per IP address and gives 1min, 5min and 15min stats akin to uptime. From the screenshot above we can see the cameras are averaging between 30 and 50 Mbps, with a total of 160Mbps of the network utilised for the CCTV system.
This was based on 4 cameras, with larger setups it may be worth exploring a more robust network layout including additions like a all wired setup and configuring extra switches to reduce bottlenecks on the internal network.
Results and further research:
The functionality of this setup is great and far better than the previous where the Pi’s were doing all the processing work. Stability is much improved with the reliability of video capture and the increased frame rate, comfortably keeping 20 fps. And time-lapse images have a uniform brightness throughout which makes them much smother after processing.
Issues to work on following this install is that images fail to load in the MotionEye GUI, this can be overcome by someone used to the GUI but for newcomers the absence of login and slider icons can be confusing.
One thought on “Motioneye – Cent OS CCTV Server”
Comments are closed.