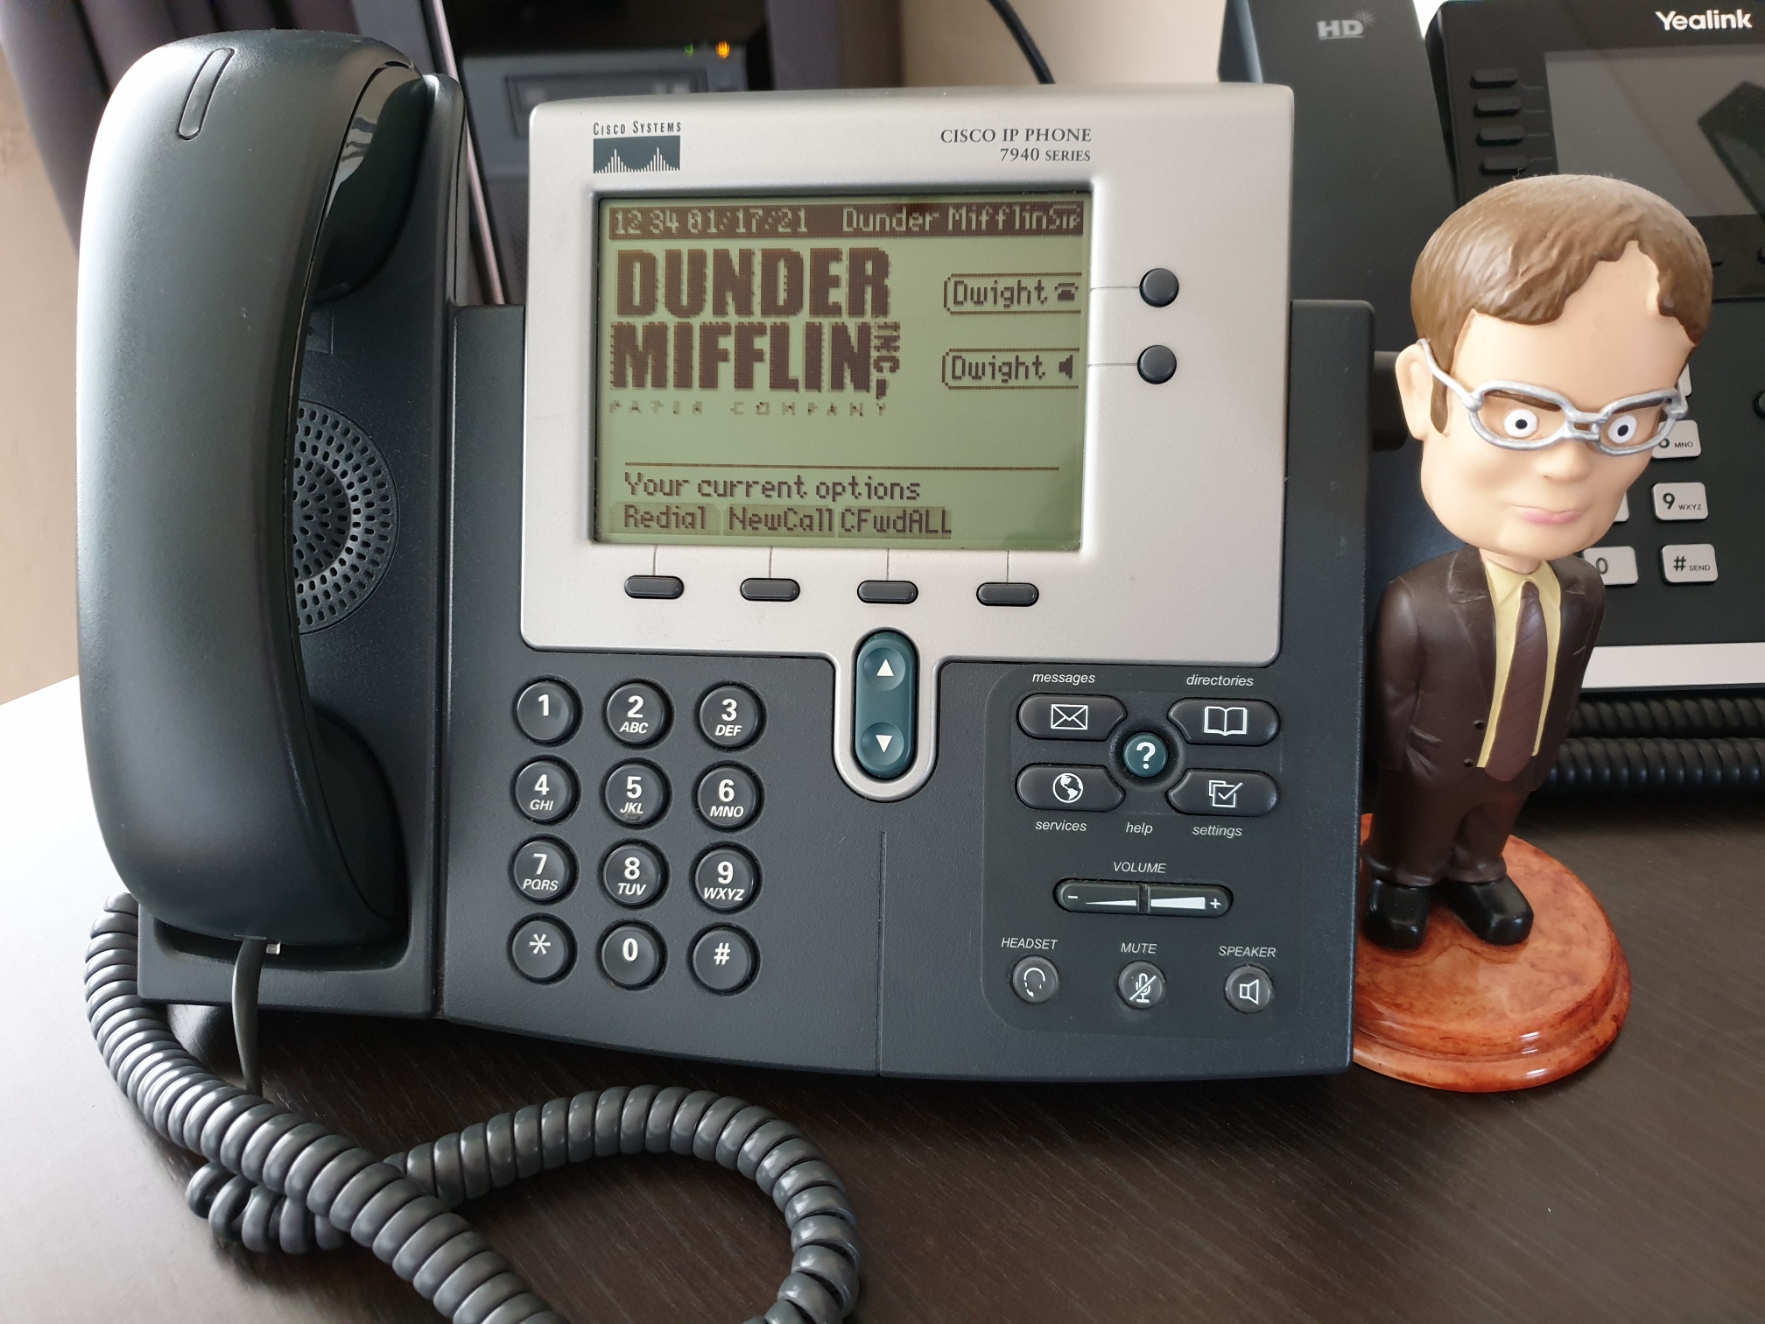
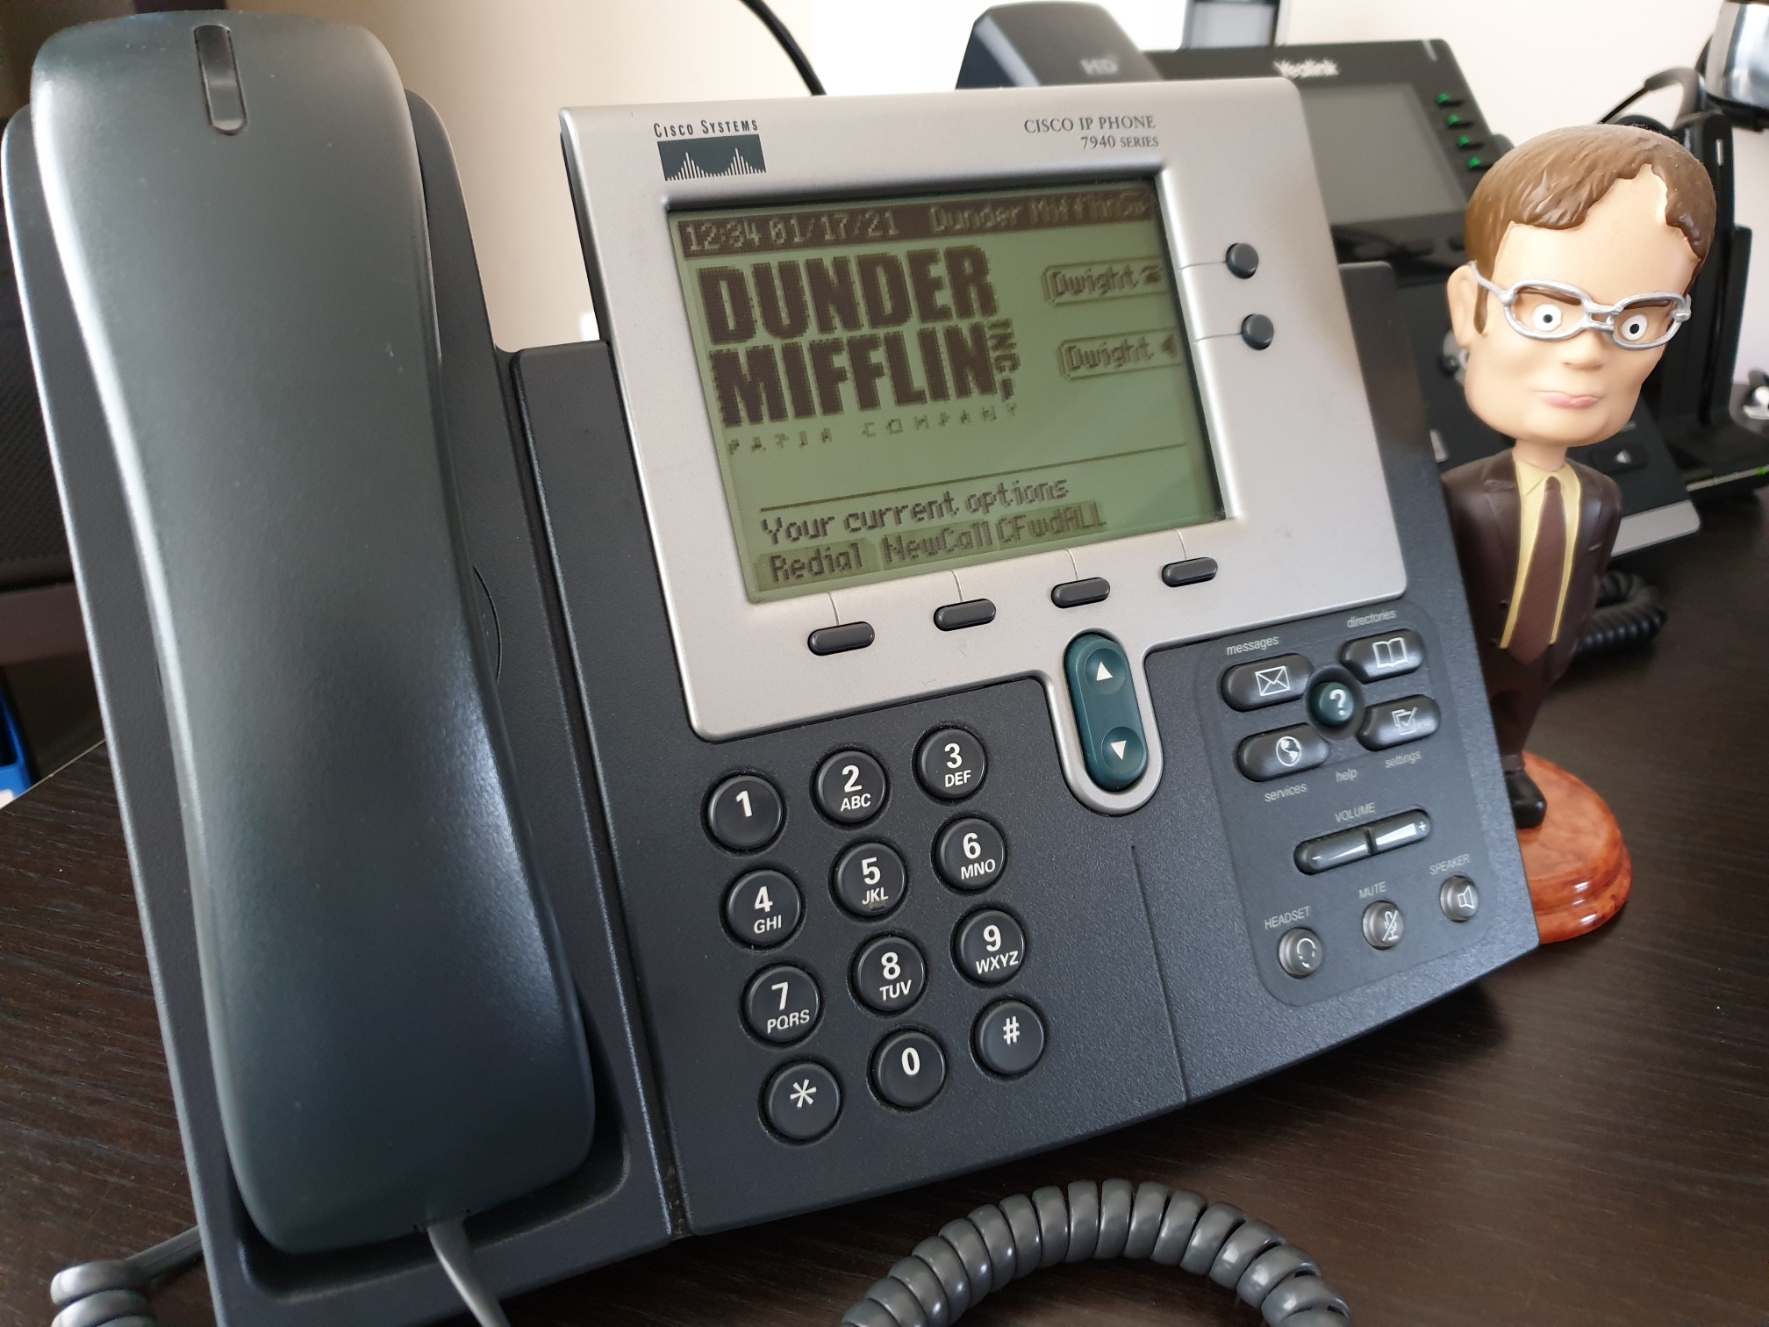
2021 is here and so returns (In the UK at least) one of my favourite shows to Netflix, The Office (US). Since starting working in VoIP its hard not to notice what phones turn up in TV shows, here the Cisco 7960, was prolific for showing up in shows around this era.
So why not, nearly 16 years after the show started, try and get one of these working on an Asterisk PBX? At work we had a number of similar 7940 models that hadn’t be used for years, so why not give it a try…
History
When the show started in 2005, these phones would need an entire Cisco ecosystem to support it, as it was essentially locked to Cisco’s propriety SCCP system. It was later and when the models were approaching end of life that a firmware update allowed it to communicate over SIP, therefore making it compatible with many more systems.
Before going further, I should note that I the telephony world, these things are ancient and have fallen way behind the capability that modern phones can offer. I would recommend these as a novelty and not be considered for deployment as it requires a lot of manual setup for little return, as we’ll go into….
Requirements
PBX: SIP based, for this example I’ll be using FreePBX, based on Asterisk.
Firmware: Dependent on what’s already loaded on the phone, you may need to source the P0S3-8-12-00 firmware that enables SIP. It can still be found with enough searching online.
TFTP Server: The 7940 can only be configured via TFTP and cannot be setup manually on the phone, so this is essential. In this example I’ll be using Windows Server 2019 and repurposing the TFTP element of Windows Deployment Services.
DHCP Options: The phones are pointed to the TFTP server via DHCP Options, a router or DHCP server capable of these is required. I’ll be setting this up on a Draytek 2862.
HTTP Server: Should you wish to add Services and a Directory, the phone pulls this information via HTTP.
Setup
TFTP Server
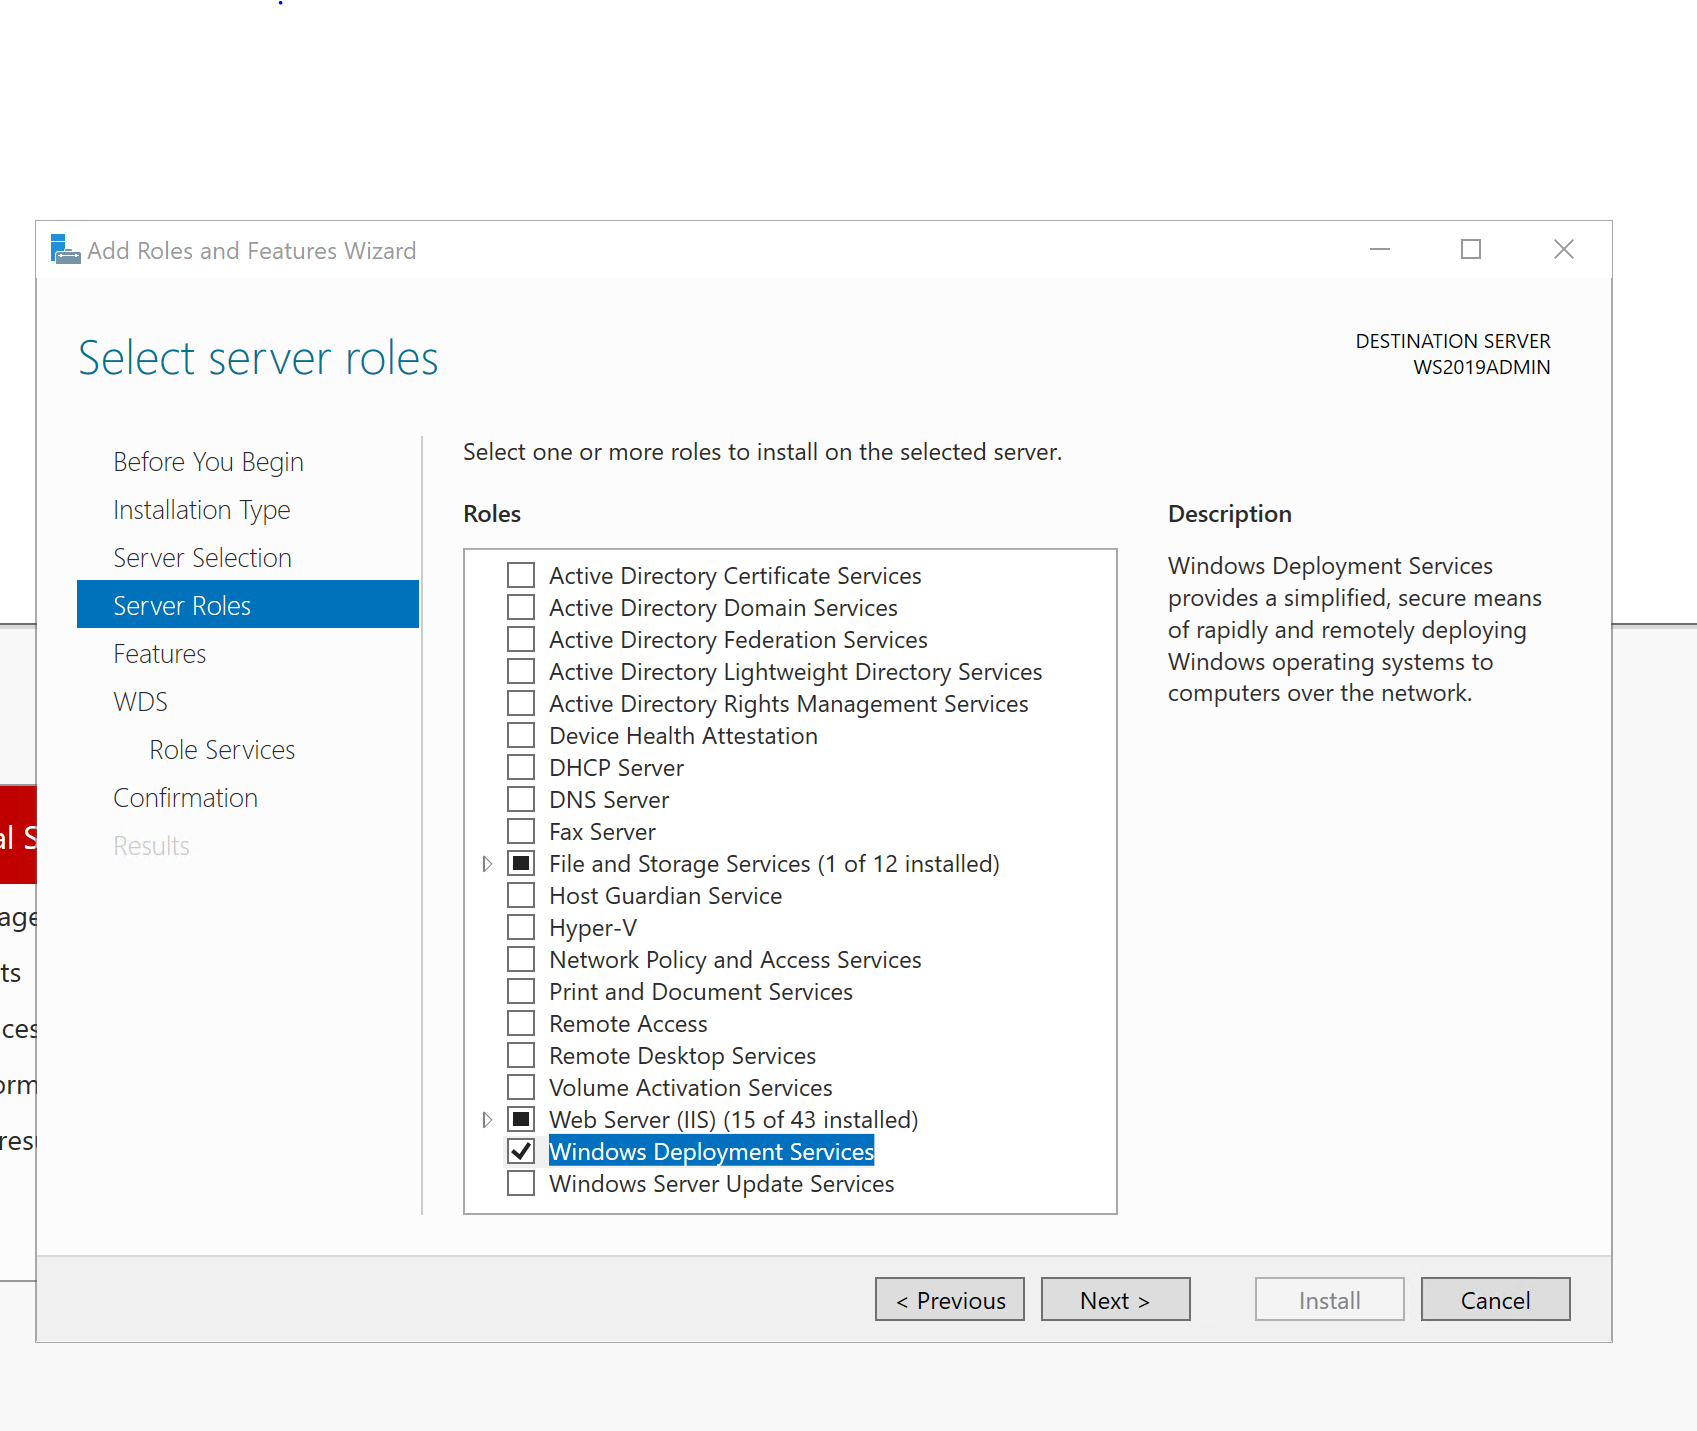
In Windows Server 2019, open Server Manager and start the Add Roles and Features Wizard.
In Server Roles, tick Windows Deployment Services
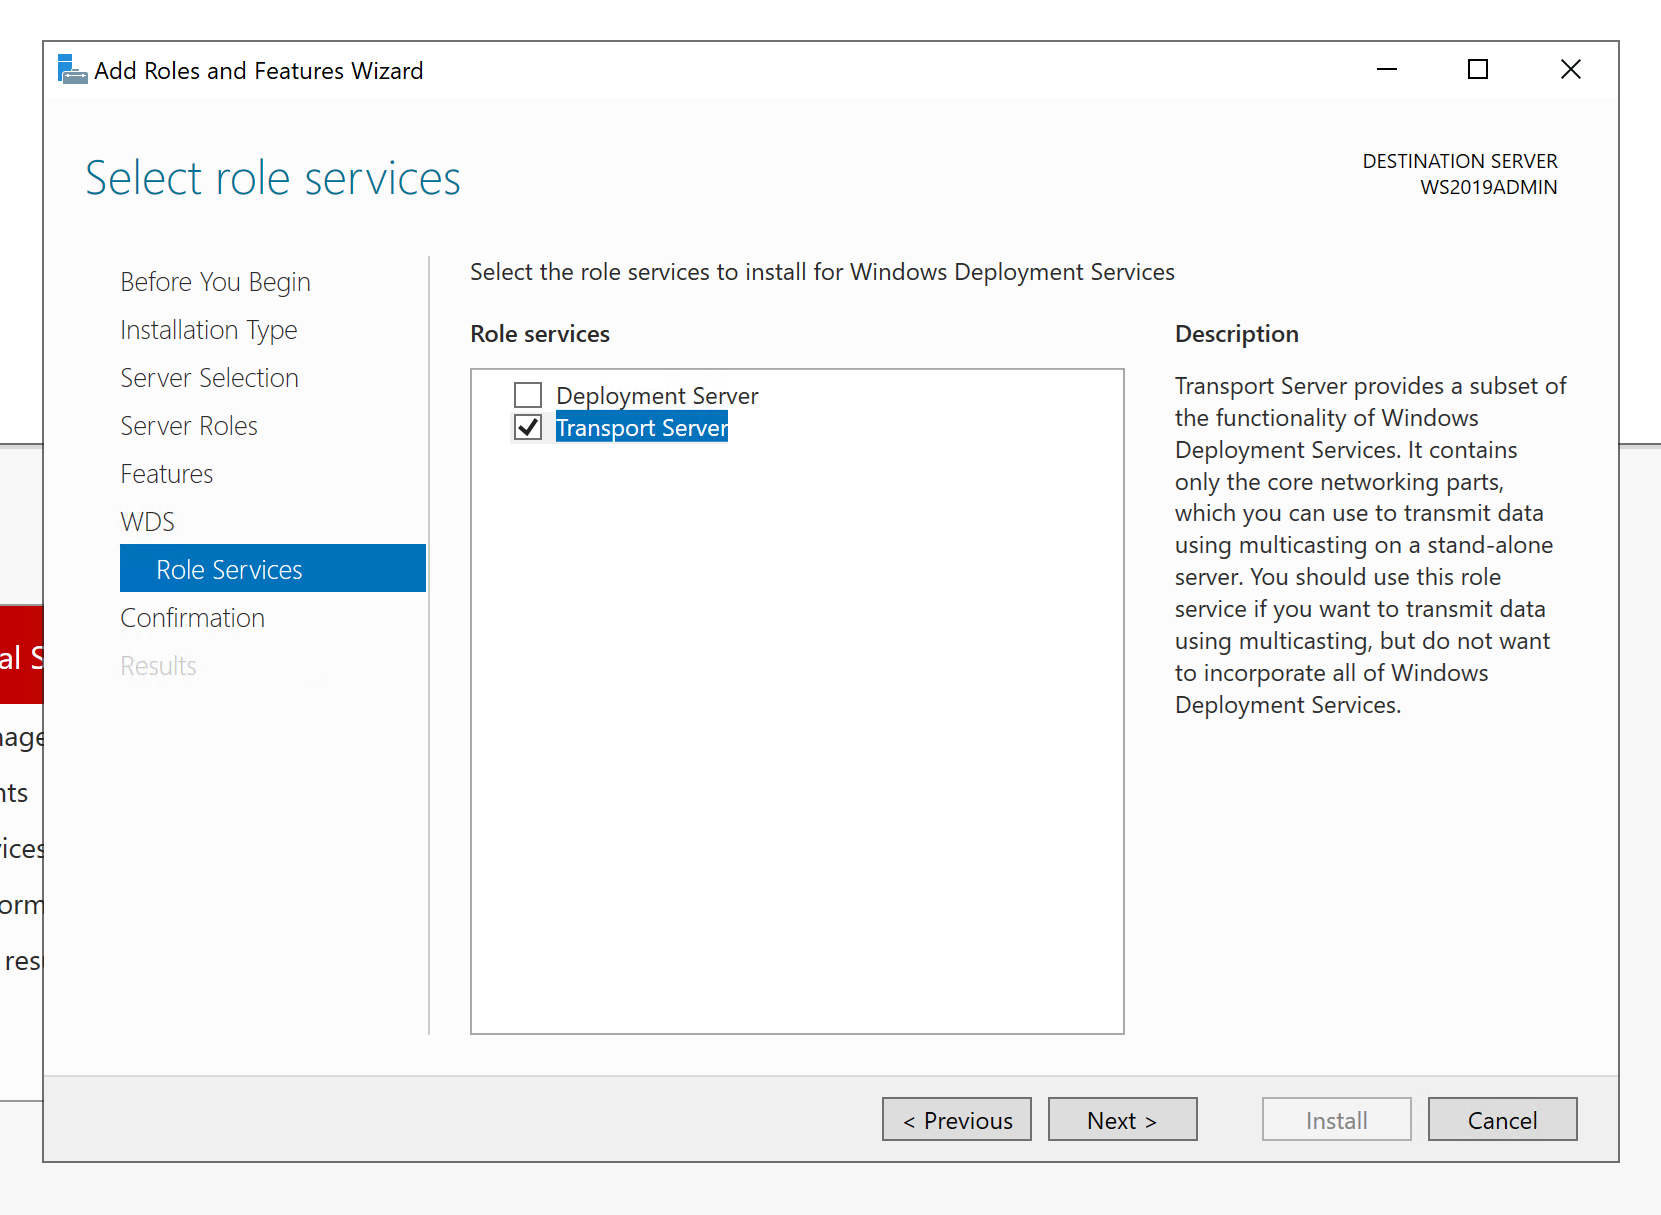
Then in Role Services, select just Transport Server to enable TFTP.
By default, Windows uses TFTP exclusively to deploy Windows images on client machines, so we’ll need to make a registry edit to allow the server to provide all files.
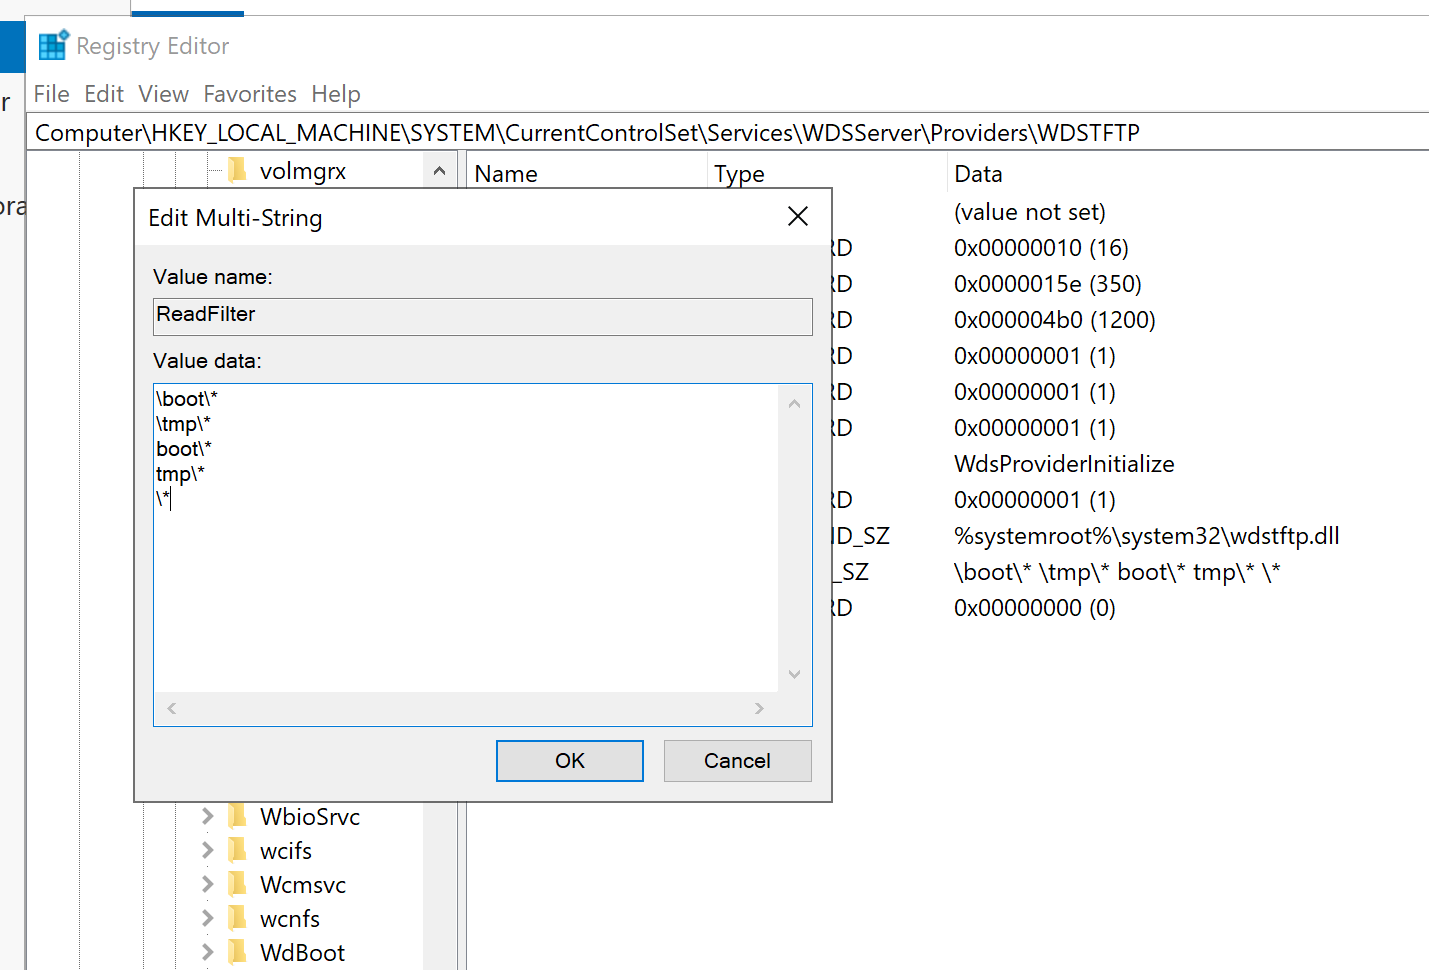
Open RegEdit, and navigate to:
Computer\HKEY_LOCAL_MACHINE\SYSTEM\CurrentControlSet\Services\WDSServer\Providers\WDSTFTP
TFTP files are served from C:\RemoteInstall by default, this can be changed by editing RootFolder value.
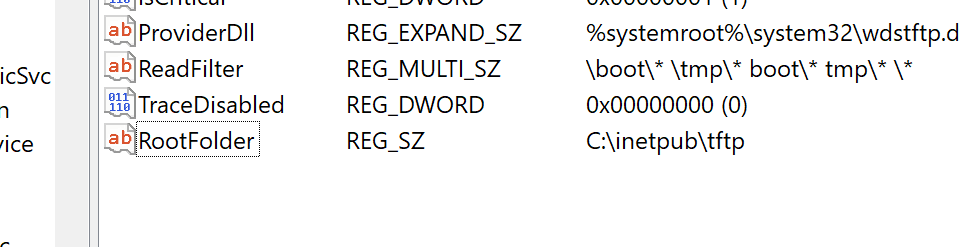
Edit ReadFilter value to add \* to allow all files to be read in the root folder.
To re load these changes, restart Windows Deployment Services Server from the Services folder.
DHCP Options
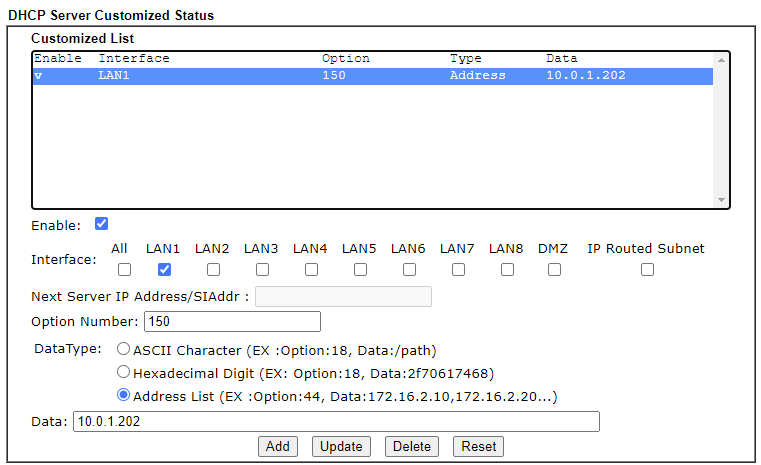
To allow the phone to know where the TFTP server is on boot, DHCP Option 150 is used to direct the phone.
Logged into the Draytek 2862, navigate to LAN –> General Setup –> DHCP Server Option button.
Enter Option Number 150, and enter the server IP address in the Data field:
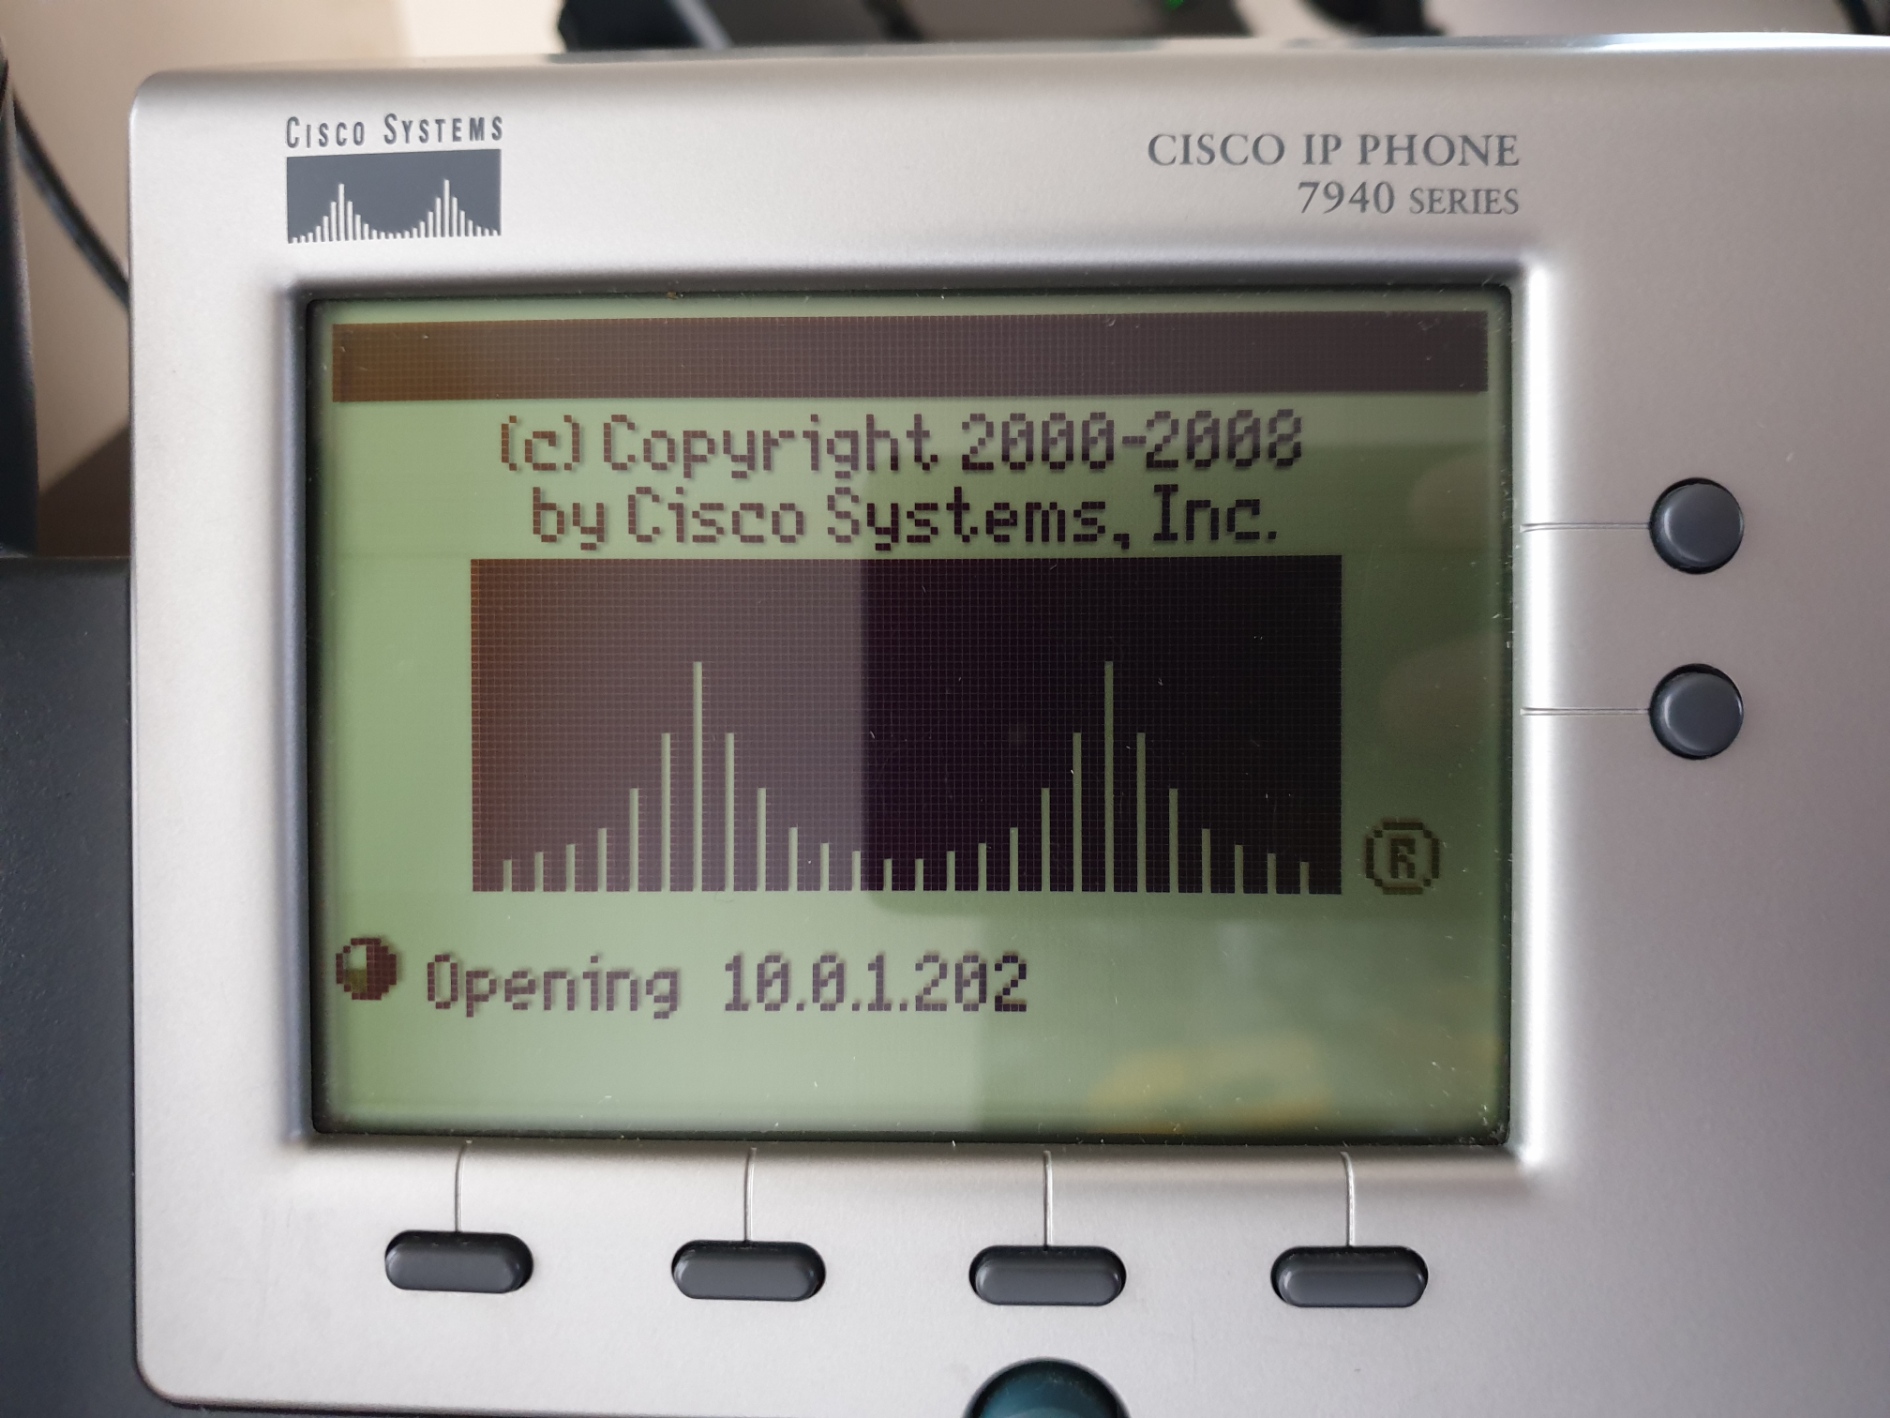
To check its working, plug the phone into the network, after initial loading it will start looking for files at the server’s IP address.
Config Files
All of the phone’s functionality is provided by the config files. As a minimum the phone requires the following for use with SIP:
SIPDefault.cnf – Common configuration for all phones on the network, containing info such as SIP server.
SIP<MAC Address>.cnf – Phone’s individual config, such as extension registration info. File is named SIP001D45000000.cnf where 001D45000000 is the MAC address of the phone.
If your phone is loaded with SCCP firmware, for instance if it was pulled from a Cisco infrastructure environment, the phone will attempt to pull a different set of files from the TFTP server.
To identify SCCP firmware, when loading the top black bar will lack the “SIP” logo on the right.
If it is the older firmware, additional files are needed to instruct the phone to update its firmware:
XMLDefault.cnf.xml – First file served, specifies the firmware to load.
OS79XX.TXT – An alternative firmware pointer file.
Then you will need the firmware files, for reference / search purposes, these are the files needed:
P0S3-8-12-00.loads
P0S3-8-12-00.sb2
P0S3-8-12-00.tar
P0S3-8-12-00.bin
P0S3-8-12-00.sbin
Factory Reset
If the phone already loads and gives an extension, it will need to be factory reset:
With the phone unpowered, hold the # key. While holding, connect power to the phone and release the # key when the Headset, Mute and Speaker buttons start lighting in sequence.
Next whiles lights are still in sequence, press 123456789*0#.
When reset menu appears, press 2 to say no to keep network settings.
Phone will reboot and is ready to provision.
Provisioning
DHCP Option, TFTP Server, files in place, the phone can now be provisioned.
Dependant on firmware level it will take up to 5mins to upgrade and provision, during which and if all goes well will get some comforting references to the files served by the TFTP server.
You now have a Dunder Mifflin issued extension.