Driving a ST7066U LCD display from a Raspberry Pi

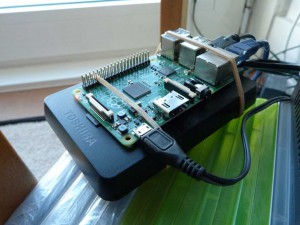
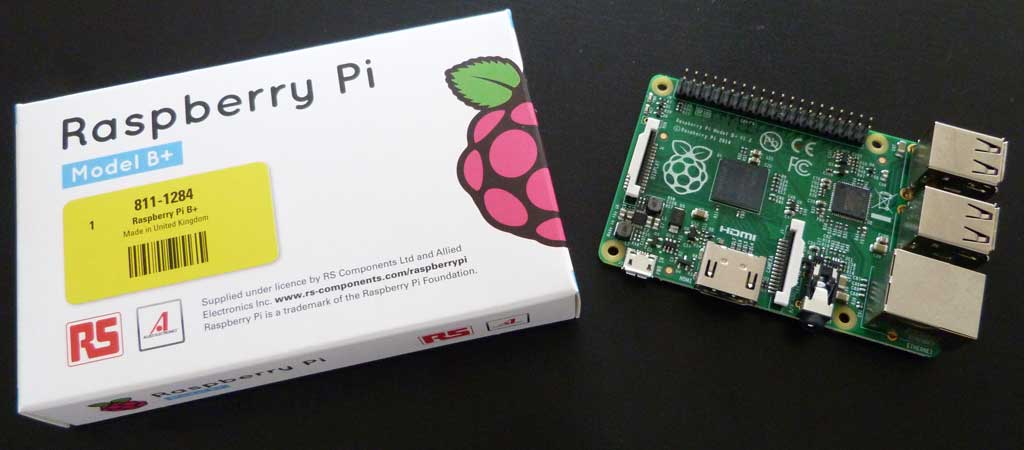
I’m between jobs at the moment, so to give my idle hands something to do I have started looking at using electronics with the Raspberry Pi.

To begin the journey, I decided to power a LCD text display, using this excellent Arduino article as a guide. As I was starting out I purchased everything needed in one order from RS Components, however they didn’t stock any displays with a HDD44780 controller.

Research revealed that a display with a ST7066U controller is compatible with being Pi powered. But be aware that although they have the same number of pins at 16, the layout may be different. I found out the hard way!

As this was the first time I connected the jumpers one at a time, and connecting the pins I thought would light the backlight, instead caused one of the chips on the LCD to get hot to the touch. Luckily I found that out quickly enough to avoid any permanent damage. Also, thanks to ordering from RS each component has a datasheet available, and so was able to connect up the correct pins.

LCD-16x2

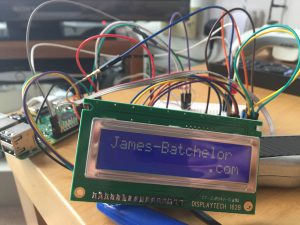
Lesson learned, establish the correct pin out on components before connecting up, other than that a ST7066U controlled LCD display can be controlled by a Pi the same as a HDD44780 controller.

Raspberry Pi Torrent Server – From Scratch

As requested, this is a guide to taking a Raspberry Pi and turning it into an always on Torrent box, complete and self-sufficient with its own mass storage meaning it needs no help from other computers. Also, as the Pi consumes such little power compared to a full desktop PC, money can be saved by using the Pi for overnight transfers while other computers can remain off.

piserver1

For this project I recommend a RPi 2, as its powerful enough to perform the transfers up to its maximum 100Mbps network speed, and is a cheaper choice since the RPi 3 superseded it last year. To get started, you need the following hardware:

  • Raspberry Pi 2 board.
  • Micro USB wall adaptor – Needs to be capable of 2Amp output.
  • Micro SD card – Minimum of 8GB, class 6 or above, plus SD adaptor for connecting to a PC.
  • USB Portable Hard drive – USB powered is preferred, I use a Toshiba Canvio Basics 1TB.
  • Ethernet Cable – And spare port on the modem/router for internet connection.
  • A PC – On the same network as the Pi for connection and configuring.

The Pi was designed to as low cost as possible to the user, so apart from the Pi board you may already have everything to run a Pi, and if not these are cheap and easily available online.

With a RPi 2 at hand, let’s get started…

Continue reading “Raspberry Pi Torrent Server – From Scratch”

Adding Kodi Sources Manually

During my migration from Windows Server 2003 to Server 2012, I encountered an issue with Kodi on Raspberry Pi and how it connects to the Win 2012 file share. When accessing the server with a Samba file share instead of a prompt for credentials the error message “Operation not permitted” is displayed.

Kodi Operation Not Permitted

Kodi allows the manual adding of network locations but does not support adding the credentials that are needed to access the location.

Therefore a bit of tweaking is needed to get access to Windows 2012 shares on Kodi.

Continue reading “Adding Kodi Sources Manually”

Connecting to a Headless Raspberry Pi

A great feature of the Raspberry Pi is that it can be fully used as a headless unit, meaning it does not need a monitor, keyboard or any other input device connected. This is great when running it as a server or for automated processes that require the unit to be tucked away.

What is annoying is that setting up the Pi for the first time may need those input devices to be able to configure the network and install applications. Thankfully there is a way to connect to a headless Pi from the start, with it only needing power and Ethernet connection.

Continue reading “Connecting to a Headless Raspberry Pi”

OSMC on Pi with PPTP VPN

The arrival of the Raspberry Pi 2 meant the B+ previously used as a server was now ready for a new purpose. These little machines make great media players and is easy to setup so this would be its new role.

However, this Pi would be in my parents’ home, and miles away from where my videos are stored. I didn’t want to add a hard drive locally as syncing the library would be an issue. But thanks to the fibre internet connection on the server side I could upload at 10Mbps, enough to stream media across the net.

Therefore, the plan is to use an install of OSMC and add a VPN connection to my home server that starts when the Pi starts to make the operation seamless.

Continue reading “OSMC on Pi with PPTP VPN”

Raspberry Pi 2

The Raspberry Pi Foundation has brought a new model of the Pi to the table, so with the same low price it was easy to add to my Pi family.

Raspberry Pi 2

For those not yet familiar with the RPi 2, it keeps the small and simple form factor of its predecessors, but gives performance upgrades in the form of an 800mhz quad core processor, with overclocking options still available, and combined it with a whole Gigabyte of RAM. These upgrades, on paper at least sound that it could make the Pi into a useable desktop machine, with less freezing during full CPU load that was easy to achieve previously.

Continue reading “Raspberry Pi 2”

New Raspberry Pi B+

Raspberry Pi B+
Raspberry Pi B+

My first RPi was intended to serve as a learning tool for Linux, allowing me to tinker with with a machine without the risk of causing damage to a computer I need on a daily basis, much akin to the design philosiphy on the Raspberry Pi. VM was available, but the ability to program straight to a physical machine akin to the microcomputer revolution of the 80’s that the Pi foundation is trying to rekindle interested me, as I was not around for that part of history.

However in my search for a project that interested me, I found Raspbmc (Now OSMC), the media centre centric OS was such a perfect solution for my televisual needs that my first RPi became dedicated to it by complimenting my home server to stream files to my screen.

With the recent release of the Raspberry Pi B+, it was time to have another go at figuring out Linux from the command line. At £35 delivered it was still cheap, and this time I know better to source the accessories like micro SD card and Power Supply in advance for a lower price.

Let learning commence!

Net Killing RPi – SOLVED!!

With my troubleshooting exhausted, I turned to the Raspberry Pi forums in hope of some new ideas on how to fix it.

I was not disappointed. I quickly got answers pointing towards RF issues around the HDMI cable or grounding of the Pi/TV.

Ferrite clips along the HDMI and power cables failed, and initially grounding failed due to the fact I was using the whole 10 metres of cable I purchased to ground the Pi. Thinking this may be causing a lot of resistance for the low current used, I shortened it to around 50cm and…

Hooorah!


DIY solution to ground the RPi.

The Raspberry Pi and my internet working in close proximity and perfect harmony. The solution is to attach one end of a short wire to the HDMI port of the Pi, and the other end is attached to the ground pin of a standard socket plug.

This has been an expensive problem for me, 2 HDMI cables, a shielded RJ11 cable for the ADSL connection and a bunch of ferrite clips/rings when all I needed was a £2.39 piece of wire from Maplin. At least one benefit of this expense is the increased broadband speed, provided by the shielded RJ11 cable, taking my connection from 2.5Mbps to 3.2Mbps.

Its all working now, taking its place tucked behind the TV and providing me with a great media player solution, the abilility to control XBMC with my Bravia TV remote is an excellent feature.

My forum thread on the RPi forums can be found here.

Net killing RPi – Getting Somewhere…

In my last post I was a confussled mess, failing to get my head around how a network device (The Raspberry Pi) could cripple an exclusive function of my router.

I decided to troubleshoot the issue further, I set up a basic ping to help me pinpoint when the internet was going down

Ping results before Pi was switched on.

After performing some basic troubleshooting, it transpired that the fault was happening whenever the HDMI cable was connected to the Pi and my Television (Sony Bravia EX4-32).

Ping results after HDMI cable connected.

Thinking it was a bad HDMI cable, I bought another, but to no avail. My next brainwave was that the Pi was emitting EMI (or RFI) which drove me to buy a 10 metre HDMI cable to get the Pi as far away from my router and other networking equipment, alas this didn’t work either.

Troubleshooting further, it turned out that the HDMI cable didn’t need to be properly connected, mealy touching the Pi on any metallic part will cause the internet to cease.

All it takes to knock me offline.

So in essence I am still no closer to solving my Pi/Internet mystery, if you can help me please comment!

All other HDMI works fine as I am now using the 10m HDMI cable as a screen extender on my laptop.

Bootnote:

In my previous post I signed off by stating that that the Pi and my internet were working in harmony. However it turned out that my modem had dialled back my downstream internet speed to 1.5Mbps instead of the usual 3Mbps, normally a result of the modem trying to obtain a more stable internet connection due to, lets say, interference on the line!