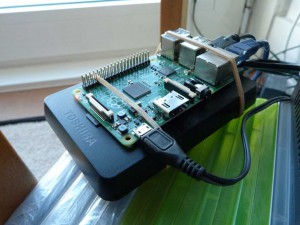
As requested, this is a guide to taking a Raspberry Pi and turning it into an always on Torrent box, complete and self-sufficient with its own mass storage meaning it needs no help from other computers. Also, as the Pi consumes such little power compared to a full desktop PC, money can be saved by using the Pi for overnight transfers while other computers can remain off.
For this project I recommend a RPi 2, as its powerful enough to perform the transfers up to its maximum 100Mbps network speed, and is a cheaper choice since the RPi 3 superseded it last year. To get started, you need the following hardware:
- Raspberry Pi 2 board.
- Micro USB wall adaptor – Needs to be capable of 2Amp output.
- Micro SD card – Minimum of 8GB, class 6 or above, plus SD adaptor for connecting to a PC.
- USB Portable Hard drive – USB powered is preferred, I use a Toshiba Canvio Basics 1TB.
- Ethernet Cable – And spare port on the modem/router for internet connection.
- A PC – On the same network as the Pi for connection and configuring.
The Pi was designed to as low cost as possible to the user, so apart from the Pi board you may already have everything to run a Pi, and if not these are cheap and easily available online.
With a RPi 2 at hand, let’s get started…
Setup
Before powering on, an operating system is needed on the micro SD card.
Download the latest version of Debian onto a PC and extract the ISO from the Zip file, then download Win32Imager that will transfer the image to a SD card.
Run Win32Imager as an Administrator by right clicking the icon, 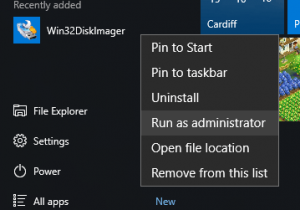 browse and choose the Debain ISO for the image, select the drive letter for the micro SD card, and click write. When complete, move the micro SD card to the Pi and its ready to boot for the first time.
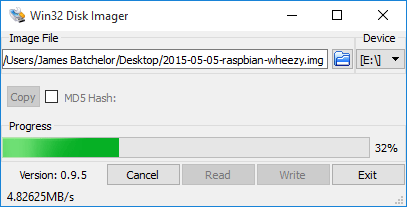
Connecting
To make the Pi less obtrusive in the home, it will be configured and run as a headless server, therefore no monitor or Human Interface Devices needed.
Follow this guide I created earlier to get connected and into a terminal window.
Housekeeping
Once connected it’s a fully functional computer, but it’s worth the extra effort to perform some housekeeping to make it easier to connect to by assigning it a static IP, and changing the password for that extra layer of security.
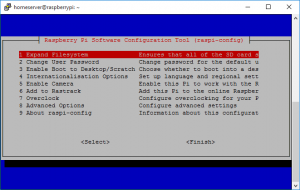
First the essentials, after a fresh install of Debian the filesystem has to be expanded so it can make full use of the micro SD card’s capacity:
In the terminal window, type raspberrypi-config. Then from the menu choose expand filesystem. Reboot the Pi and connect again, now the full capacity is useable.
Next, and optionally, change the default password:
From the terminal, type sudo passwd, then follow the prompts to change it. No need to reboot.
Next is to assign the Pi a static IP address, allowing it to be found at the same location on the network every time, handy as connecting to the torrent client requires knowing the Pi’s IP address:
From the terminal, type sudonano /etc/network/interfaces to bring up the network config file. In the text editor that opens, find the string beginning eth0, and edit it to look like the following:
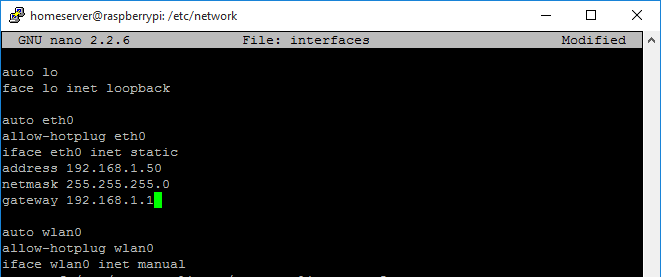
Where the gateway is the IP address of your router and the address will be the new home of the Pi, for those not familiar with IP addresses, copy the first three numbers from the routers IP address, and for the final number use a number between 150 and 253, this is usually high enough not to interfere with other devices on the network.
Use Ctrl + O to save the file, then Ctrl + X to exit.
Then type sudo reboot to restart the Pi, and now it can be found on the new chosen IP.
Connecting USB Hard Drive
By default the Pi does not supply enough power to the USB ports to power and mechanical drive, but with a little tweak of the settings it can deliver enough to fully power a USB hard drive.
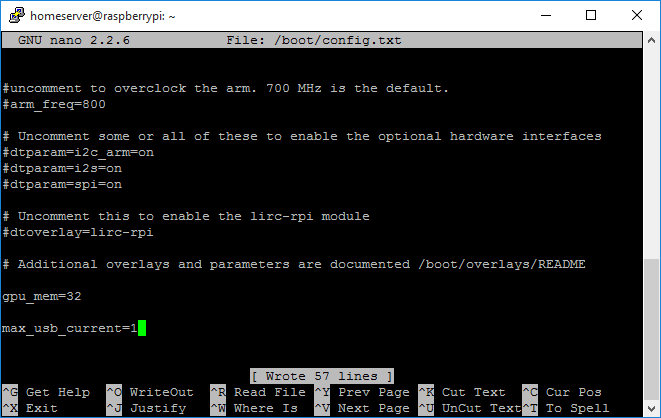
In a terminal, type sudo nano /boot/config.txt
Scroll to the bottom of the file using the F8 key, then add the following new line:
Max_usb_current=1
Use Ctrl + O to save the file, then Ctrl + X to exit.
Reboot the Pi by typing sudo reboot.
From a new terminal window, check the drive is connected by typing
sudo blkid, it will appear as dev/sda1
With it recognised, use sudo mkdir /media/HDD to create a folder that will be used as a gateway to the new drive.
Then mount the drive by typing
sudo mount –t auto /dev/sda1 /media/HDD
The Pi can now write to the USB drive for the duration the Pi is powered on, but for simplicity it needs to be available if the Pi reboots…
Configuring & Sharing USB Hard Drive
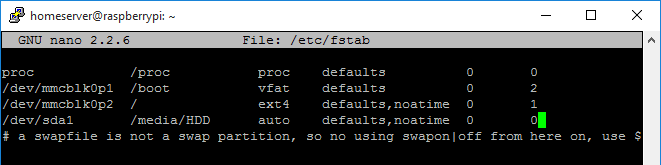
To allow the drive to automatically mount upon startup, type
sudo nano /etc/fstab to open the file system config file.
Add the following line under the existing entries:
/dev/sda1 /media/USBHDD1 auto noatime 0 0
Use Ctrl + O to save the file, then Ctrl + X to exit.
Next up is to install samba, it allows the Pi to communicate with windows computers on the network, allowing easy access to downloaded files.
Type sudo apt-get install samba
When installed, open the config file by typing sudo nano /etc/samba/smb.conf
Enter the following information at the bottom of the file:
[Media]
comment = Mass Storage Share
path = /media/HDD
browsable = yes
read only = no
force user = root
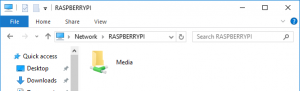
Ctrl + O to save the file, then Ctrl + X to exit, then reboot with sudo reboot. When restart completes the Pi can be accessed by typing \\raspberrypi in a folder address bar, or will show as a network device in Windows explorer.
Installing Transmission
For torrent sharing, Transmission is used as a simple and quick program.
Update the Pi by using sudo apt-get update, followed by sudo apt-get upgrade. These may take a while to complete but ensures the latest software is running, including the latest version of Transmission.
Then type sudo apt-get install transmission-daemon and install the program, pressing Y when prompted.
Configuring Transmission
As you may have guessed, configuring anything in Linux means editing a text file, but first the Transmission service must be stopped to allow changes, by typing sudo server transmission-daemon stop.
Now open the settings by using
sudo nano /etc/transmission-daemon/settings.json
Here are all the settings, but for now scroll (F7&F8 keys) to locate rpc-whitelist, and edit it to include your local ip address range, like below:

Then change download-dir and incomplete-dir to point to a folder on the USB hard drive, using /media/HDD/Complete and /media/HDD/Downloading respectively. Be sure to create a Complete and Downloading folder on the hard drive before setting these, this can be done in Windows explorer by navigating to \\raspberrypi .
Also for convenience the password can be switched off by changing
rpc-authentication-required from true to false.
As always, Ctrl + O to save the file, then Ctrl + X to exit.
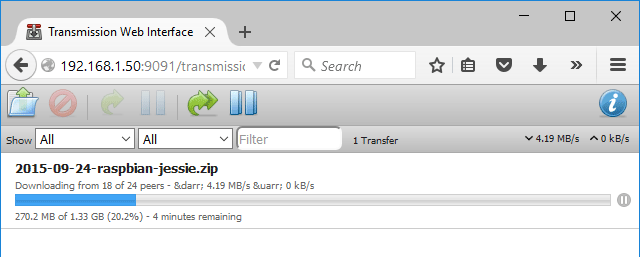
Using Transmission
The great feature of Transmission is its own web server and that all control is done via a webpage, allowing the Pi to function headless and the torrents managed by any internet capable device.
On another PC, open your favourite browser and navigate to
http://PI-IP:9091 replacing PI-IP with the static address you chose earlier.
From here it’s a fully functional, low cost, low power torrent box. An easy test is to revisit the RPi foundation’s website and download Debian via torrent, then seed it help others discover the wonderful world of Pi.