Connecting a printer to a server compared to a desktop system is not as straight forward as it may be perceived. Whether the manufacturers software simply refuses to install on Windows 2003 or insists on adding a load of bloatware on your system, here is how to get around it:
Step 1: Start by downloading the basic version of the drivers from the HP website, choose Windows XP drivers if there are none for Windows 2003
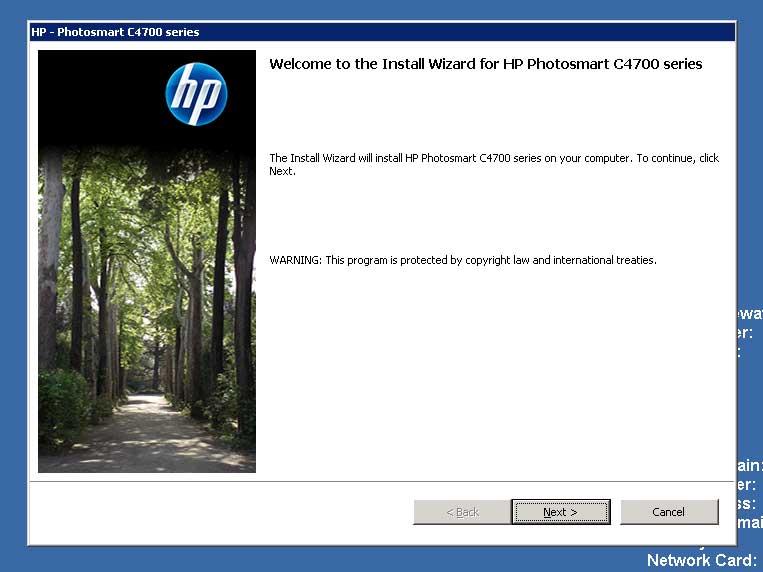
Step 2: Open the executable file, allow it to extract and display the first setup screen. Here, depending on the printer chosen it may let you continue with the setup, or stop the installation there telling you the operating system is not supported.
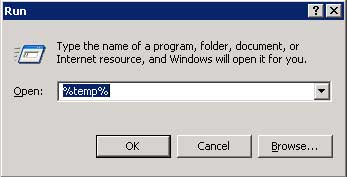
Whatever the installation screen displays, DO NOT CLOSE THE WINDOW, while its open all the files you need are made available. Next navigate to your temp folder. TIP: Go to Start Menu à Run, and type %temp%. This will bring up your temp files.
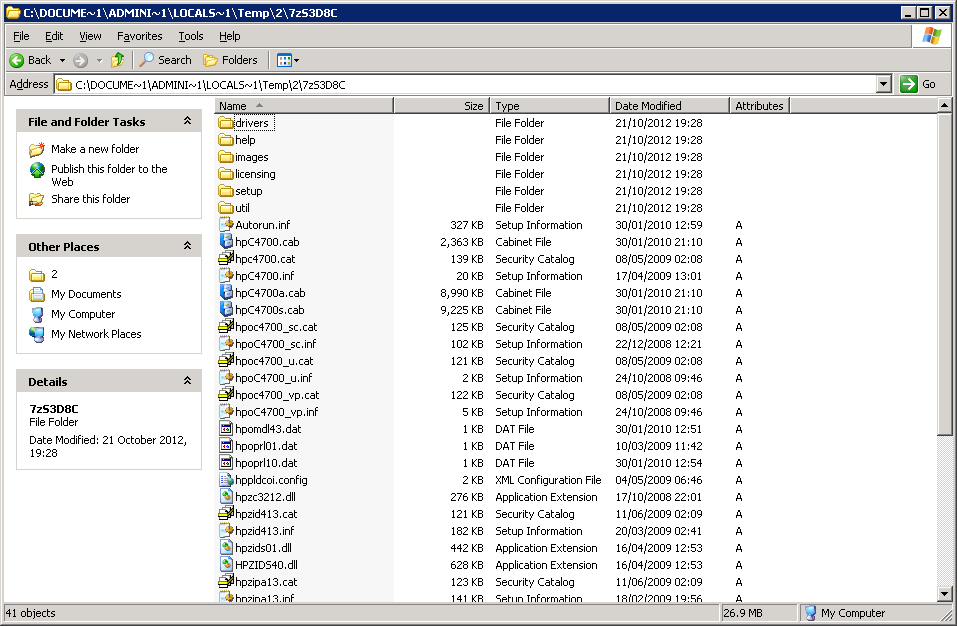
In the temp folder, look for a folder containing the setup files that were extracted as part of the installation, it will usually have .inf files that contain the printer model as part of the filename, below is an example of the drivers to install a HP C4700:
Step 3: At this point its best to copy (not move) the contents of the folder to a more convenient location. When a copy is made, you can close the installation utility as you have all the files in a new location.
Now navigate to Start > Settings > Printers and Faxes, and then start the Add new printer wizard.
After the intro splash, choose “Local printer attached to this computer” and un-check the box for “Automatically detect and install my Plug and Play printer”
Note: Step 4 is for installing a printer over a network, if you are connecting via USB, skip to step 5.
Step 4: Click next, on the next screen you will want to select “Create a new port” and choose “Standard TCP/IP port” from the drop-down menu, as below:

This brings up a new wizard, after the intro splash onto the add port screen, type the IP address of the printer:
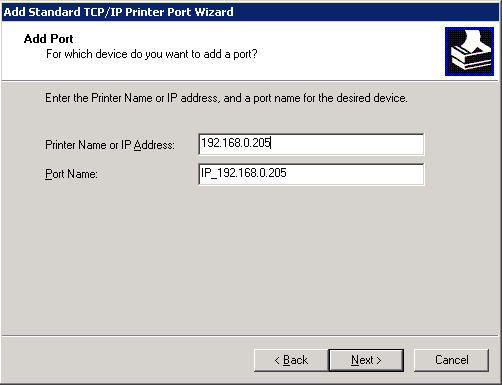
NOTE: To save reconfiguration in the future, remember to set the printer to have a static IP address as you are not installing the program that find the printer on a dynamic IP address.
The next screen, leave the settings as a “Standard device type” and “Generic network card”. Clicking next brings you to printer software screen.
Step 5: Click the “Have Disk” button and navigate to the copy of the installation files.
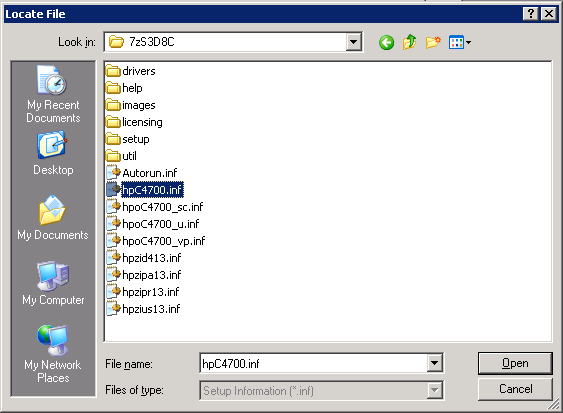
Only .inf files show, and you want to choose the most generic file name that is similar to your device, in this case above hpC4700.inf seems the most obvious.
If the right file has been chosen, you see your printer display as below.

If you get a warning message about a digital signature, choose “Continue Anyways”, but make sure you downloaded the drivers from a reputable site, such as the official HP website.
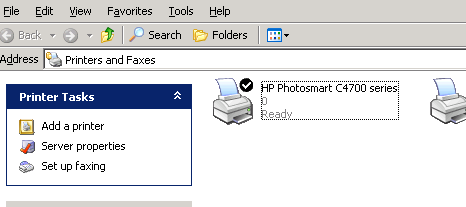
The installation wizards copies the files, then choose to print a test page to make sure all is well, and your HP printer appears in your printers folder.