There are occasions when the storage capacity of a virtual drive needs to be increased. In production environments a backup and re-install of an OS to a higher capacity provision may not be practical.
Many of our systems deployed from OVA’s use Gentoo as it’s base OS for inexplicable reasons, here’s how to increase the drive capacity of a VM instance running Gentoo and make the extra space usable…
Prework
SSH into the machine and identify the volume to benefit from the increase by entering
df -h
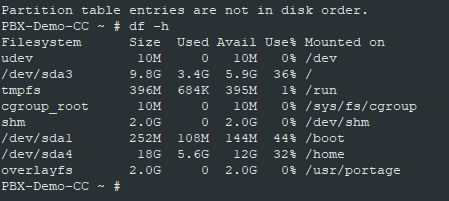
In this scenario the /home mount point requires the extra space, this is served by the /dev/sda4 Filesystem.
Now discover which disk this is on and where it sits in the layout of the disk (partition):
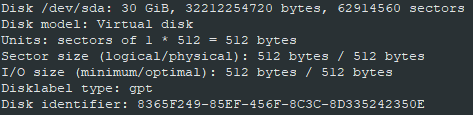
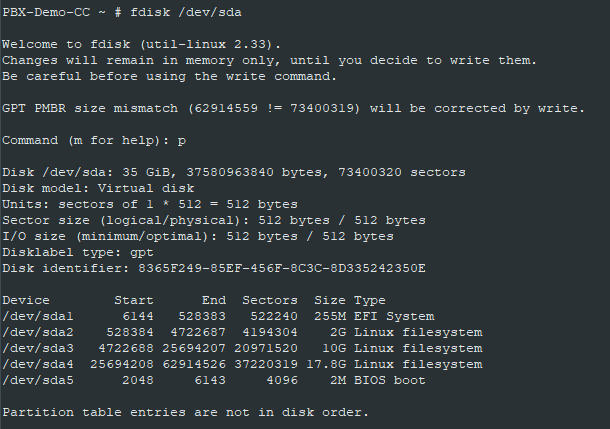
fdisk -l
The virtual disk is detailed towards the end of the output, and is identified with sda, multiple disks will be lableled sdb, sdc etc.
Along with the partition table at the end:
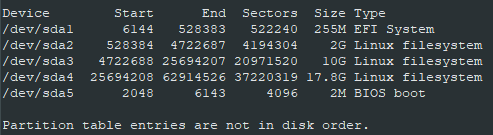
/dev/sda4 is located towards the end of the disk as denoted by the start and end sectors, so will be able to increase the disk by adding extra storage onto what is effectively the end of the drive.
Increase Drive Capacity.
Shut down the VM.
At the hypervisor, edit the configuration of the VM and enter a new capacity.
IM

Start up the VM, restore any Replications (and wait for initial sync to complete)
Highly recommended to take a snapshot at this point.
Reconfigure Partitions
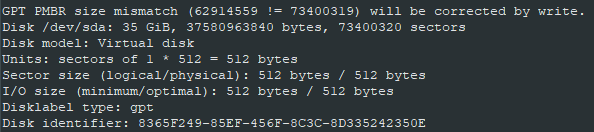
SSH back into the machine, fdisk -l can be used again to sanity check that the drive now has increased capacity:
Now to assign this extra capacity to the volume, edit the disk partitions by entering:
fdisk /dev/sda
To refresh yourself on the current partition layout, enter p command to view, it also helps to have this on screen for the next steps…
As mentioned, here the goal is to increase /dev/sda4. To achieve this we need to remove this partition then re-add it to overlay the current structure but including the extra space. Sounds scary, but these changes aren’t in place until we commit the changes later. Nevertheless a good time to check the recent snapshot has completed.
Delete the current partition using command “d”, then entering partition number:
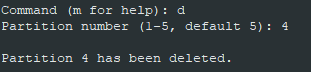
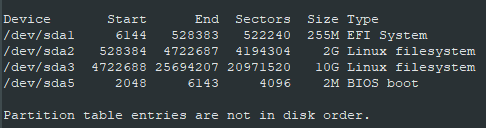
Again, can you the “p“ command to check its gone.
Now create the new partition with the “n” command.
Prompted for the first sector, enter the same value recorded on the original partition
The last sector, enter the default value shown, this should be greater than the original partition as there’s more storage available.

Output will advise that partition is made, then ask if you want to remove the signature. Enter NO to keep it, as we want to keep the original partition intact.

Finally, enter “w” command to write and commit the changes.
Reboot the VM.
Assign new space.
On restart, using fdisk -l will confirm the partition is bigger:

However, df -h will not have increased:

To use the extra space, we need to tell Gentoo that its available to use by entering:
resize2fs /dev/sda4
Output should look like this:

Now df -h will reflect the extra space and is ready to use:
