The firewalls in front of our PBX’s are configured to only allow SIP traffic from UK IP addresses, this reduces the attack surface and is usually not an issue as almost all legitimate traffic is from the UK.
As we expand there is greater need for international connections, this is fine if they have a static WAN IP or FQDN, but the more recent requirements are for “home” users with phones on their residential connections where dynamic IPs are the standard.
Changing the whitelisted IP every time their IP changes is not only tedious, but gives poor service, plus due to recent events (here and here) I’m not prepared to open access to another country for a single extension.
In my case, these internationals are satellites of a UK based office, so the idea is having the overseas phone route all voice traffic through the UK office where its free to connect to the PBX…
For this setup, a Yealink T46S will connect to a Draytek 2927 via OpenVPN and crucially, route all traffic destined for the PBX via the VPN to get around the GeoIP block.
This guide should also be compatible with the Draytek 2865, and Yealink T4xS and T4xU series phones.
Notepad++ and 7zip are required.
Draytek Setup
Original Guide: https://www.draytek.com/support/knowledge-base/7462
First create a user for the Yealink, at the router GUI navigate to: VPN and Remote Access >> Remote Dial-in User.
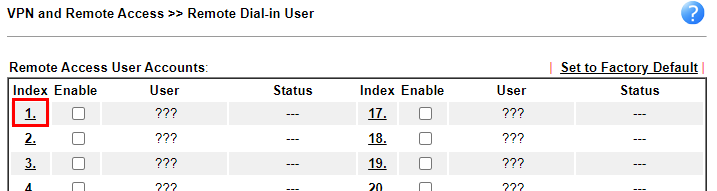
Click an Index number and make the following changes:
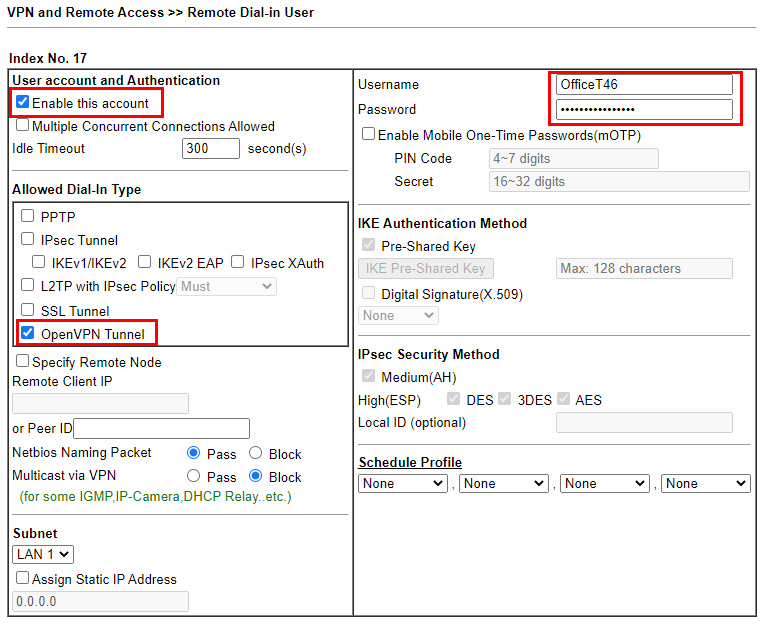
- Enable this account: On
- Allowed Dail-In Type: OpenVPN Tunnel: On
- Username: Enter a username
- Password: Enter a password
It should look like this:
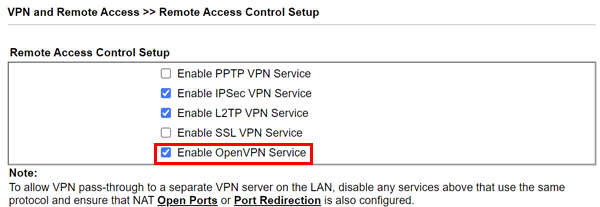
Next is to setup the Draytek to accept OpenVPN connections.
Navigate to VPN and Remote Access >> Remote Access Control. And check OpenVPN is enabled.
Then navigate to VPN and Remote Access >> OpenVPN >> OpenVPN Server Setup.
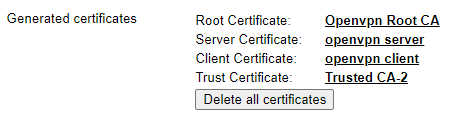
In the General Certificates section, select Router Generated Certificates, and then press generate.
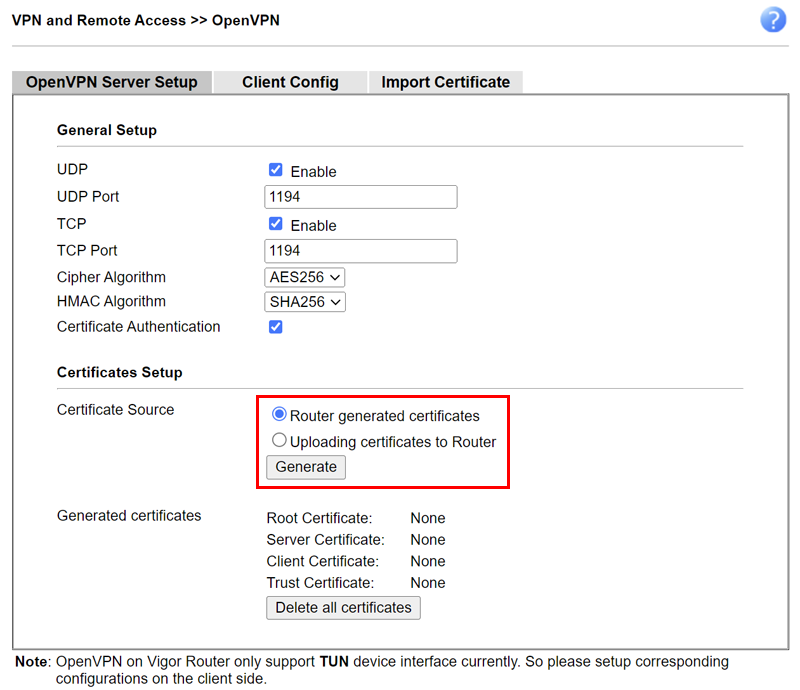
After some time, the generated certificates appear in this section:
OpenVPN Setup
The Draytek has the ability to create an OpenVPN config file for clients. However, what the Draytek generates and what the Yealink requires is not compatible. Therefore, we’ll need to manipulate the file to file to get what we want.
Extracting Certificates
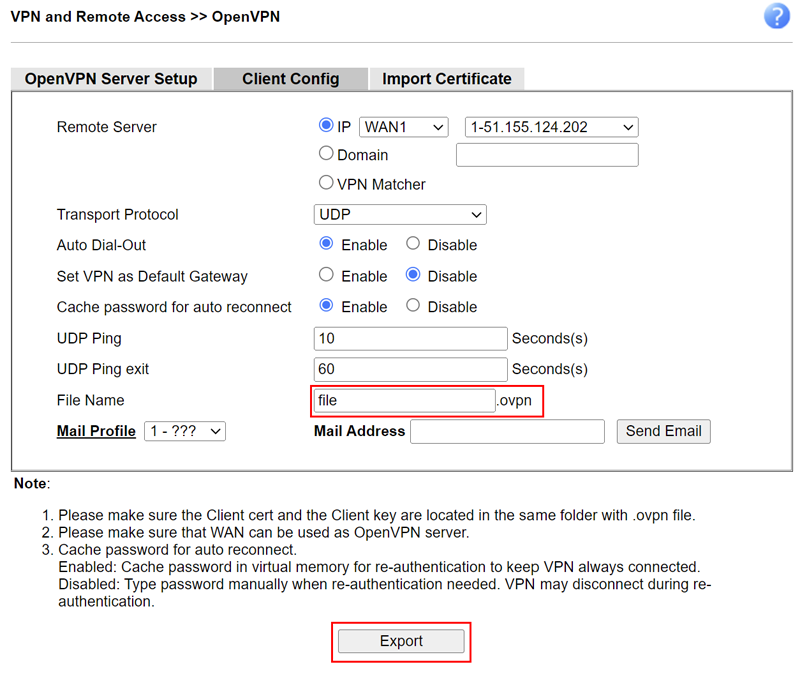
On the Draytek, navigate to Remote Access >> OpenVPN >> Client Config.
Leaving defaults in place, enter a filename and click the Export button to download the config file.
Open the file in Notepad++.

You’ll see the protocol config at start of file, followed by each of the certificates in the following order:
- CA
- Client
- Private Key
The Yealink requires the certificates in their own file so they need to be extracted.
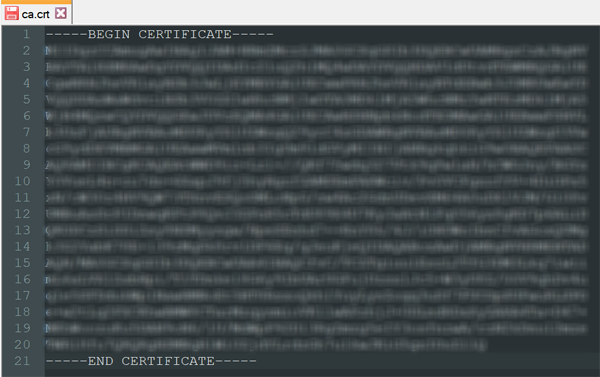
Copy the text from —–BEGIN CERTIFICATE—– to —–END CERTIFICATE—– of the first certificate and paste into a new Notepad++ file.
Save this file as ca.crt (remove the txt file extension)
Repeat this for the second certificate, naming this one client.crt
Now it’s the private key, copy text from —–BEGIN RSA PRIVATE KEY—– to —–END RSA PRIVATE KEY—– to a new file and save as client.key
Config files
For the next file, you’ll need to add the Draytek VPN user details as a file to allow the Yealink to authenticate.
In a new text file, enter the username and password on separate lines as below:
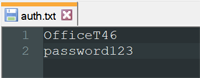
Save the file as auth.txt
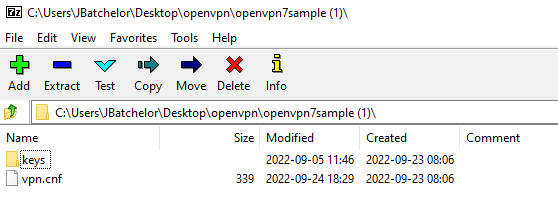
You’ll now have the following files:

With the supporting files ready, it’s time to reference them together with the OpenVPN config file.
In a new text file, enter the following info:
client
dev tun
proto udp
remote nnn.nnn.nnn.nnn 1194                  # IP address of Draytek
auth sha256
cipher aes-256-cbc
resolv-retry infinite                        # Reconnect if dropped
nobind

ca /config/openvpn/keys/ca.crt
cert /config/openvpn/keys/client.crt
key /config/openvpn/keys/client.key

auth-user-pass /config/openvpn/keys/auth.txt

persist-key
persist-tun

route nnn.nnn.nnn.nnn 255.nnn.nnn.nnn nnn.nnn.nnn.nnn  # Static route:
                                                       # PBX IP
                                                       # IP Subnet
                                                       # Draytek LAN Gateway
verb 5
Save this as vpn.cnf
Preparing Yealink File
The OpenVPN configuration is uploaded to the Yealink via a specifically arranged tar file, so the directory structure needs to be prepared.
On your desktop, create a new folder (named anything you like) and within this folder create another named “keys”
Move vpn.cnf to the upper folder, and move auth.txt, ca.crt, client.crt and client.key to keys directory.
Open 7-Zip and navigate to the newly created folder:
Highlight vpn.cnf and keys, right click and choose 7-Zip >> add to archive.
Ensure the following is set:
- Archive format: tar
- Compression level: Store
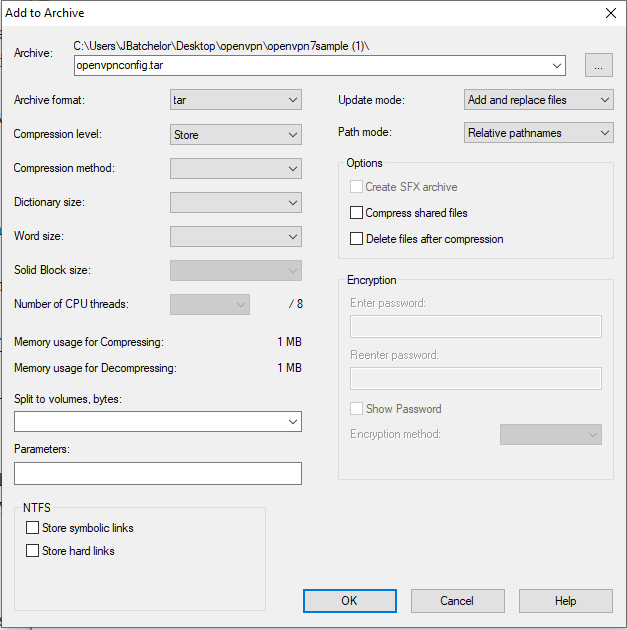
Click OK to create the file. The tar file is created in the directory and it’s ready to be uploaded to the Yealink
Yealink Setup
On the phone, press the OK key to discover it’s IP address, then navigate to it’s Web interface via a browser on your computer.
Login, then move to Network >> Advanced and scroll down to the VPN section.
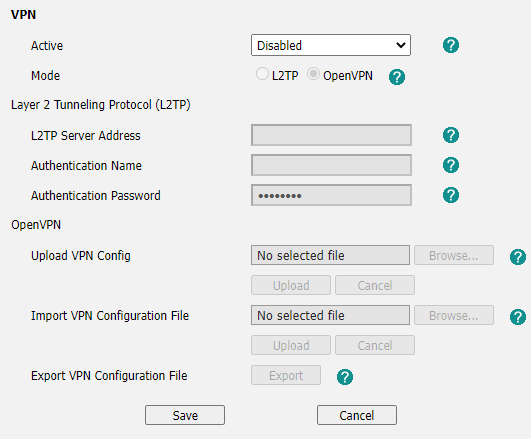
Set Active to Enabled and set Mode to OpenVPN
Click browse next to Upload VPN Config and choose the created tar file.

Click Upload, the page will refresh and now Upload VPN Config is populated with vpn.cnf
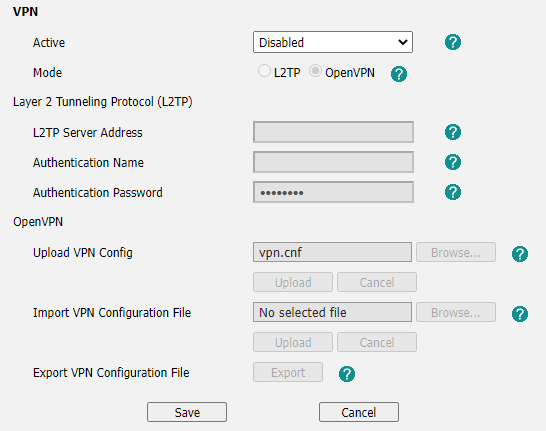
Click Save at the bottom of the page.
OpenVPN will be set back to Disabled, scroll down and Enable it again, then click Save.
As there’s a network change pending, you’ll need to click apply at the warning message:

It’ll now connect to the VPN.
Note: If you are configuring a phone remotely, the web page will stop responding as traffic is now passing through the VPN. To get back to the interface, check the Draytek for the VPN connection (VPN and Remote Access >> Connection Management) to discover it’s local IP:

The phone is now connected and routing traffic via the VPN.